UIButton *myButton = [UIButton buttonWithType:UIButtonTypeRoundedRect];
myButton.frame = CGRectMake(20, 20, 200, 44); // position in the parent view and set the size of the button
[myButton setTitle:@"Click Me!" forState:UIControlStateNormal];
// add targets and actions
[myButton addTarget:self action:@selector(buttonClicked:) forControlEvents:UIControlEventTouchUpInside];
// add to a view
[superView addSubview:myButton];
Thứ Ba, 12 tháng 10, 2010
Thứ Năm, 7 tháng 10, 2010
How to Integrate In-App Purchases
From: http://www.splashnology.com/blog/iphone/360.html
General Information
There are three types of In-App Purchases:
- Consumables
- Subscriptions
Non-Consumables
A consumable purchase may be effected more than once. For example, if you've ever played the game Eliminate you know that you need to
restore your «energy» from time to time, when its level goes too low. The catch is that a player can either wait for three hours until the energy is replenished naturally or buy it for real money.
A non-consumable purchase can be effected only
once. This kind of purchase is useful for unlocking new themes, additional levels, and so on.
A subscription can be used, as you might have guessed, for subscribing to some service. For example, you can make an iPhone application for a Web service with a Premium account that is activated, say, for a month or for a year.
You can implement In-App Purchases using either of the following two models:
- Built-in model
- Server model
The built-in model lets the user unlock some featur
es. Usually it means that those features must already be present in the application, so that StoreKit only handles the payment for the feature. Generally, StoreKit lets you check whether the purchase was successfully effected.
The server model is more flexible and involves three entities: an iPhone application, the Apple server and our (that is the developer's) server. All new features are stored on our server, so we don't have to update the application whenever we add some new features or new software products. The model works as follows:
- The iPhone application requests a list of products from its server.
- The iPhone application displays the new products to the user.
- The user buys something — or doesn't. :)
- The iPhone application requests the purchase from the Apple server via StoreKit.
- StoreKit delivers the reply.
- The iPhone application forwards the reply to our
- The reply is re-checked — it must be always verified whether the reply was actually received from Apple's server.
- If everything is fine, the iPhone application downloads the new product from our server.
server.
This article is about the built-in model.
Implementation
To demonstrate how the built-in model works I'll be using a test case, AppPurchasesExample — a simple iPhone application that has three windows. The main window, which the user can see by default, contains information about two other windows, which can be unlocked only if the user agrees to pay for that.
Step 1. Creating App ID
Go to the iPhone Developer Program Portal and click on App ID
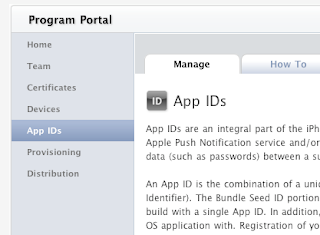
Click on New App ID (in the screen's top right corner), then enter the information on your application. I've filled in the form as follows:


Apple recommends using the Reverse DNS naming convention to make a Bundle Identifier, which ensures that your identifier is unique — that might save you a lot of trouble when publishing your application. It is extremely important that you do not use the asterisk (*) in the Bundle Identifier! If you fail to follow the advice and enter com.wordpress.indiedevelop.* or something like that, In-App Purchases won't work at all!
Then you need to enable In-App Purchases for your App ID. In the App IDs list, click on your Bundle Identifier's Configure button. When a Configure App ID form appears, check the Enable In App Purchase box.


Step 2. Creating the Development profile
- Click on Provisioning in the left column, then go to Development.
- Click on New Profile and fill in information as needed. You can put anything into the Profile Name field (as for me, I just typed in «InAppPurchasesExample Dev»).
- The newly created profile that appears in a list has a pending status. To make the profile available for download, either refresh the page or switch to another tab and then back.
- You can download the profile and then install it in xCode; to do the latter, either double-click on the profile or drag and drop it on the xCode icon.
If installation is successful, Organizer opens in xCode and you see something like this:


Step 3. Creating an application in iTunes Connect
To test your In-App Purchase application, you must create it in iTunes Connect. Do it as follows:
- Go to iTunes Connect and click on Manage Your Applications, then select Add New Application.
- When the question «Does your product contain encryption?» appears, answer in the negative.
- Filling in the form — giving your application name, description, version No., category, and so on — should be easy. The only difficulty may be with SKU Number, which must be unique; as for me, I entered «IAPEX» (abbreviation for In-App Purchases Example).
- On the Upload form, select «Upload application binary later.» (The other parameters and forms are irrelevant for my example.)
Step 4. Creating In-App Purchases in iTunes Connect
- In iTunes Connect, click on Manage Your In App Purchases, select Create New, and choose your application.
- Select Bundle ID and fill in the information on Purchase (type, name, price, etc.). Though you can use almost anything for a Product ID, I still recommend using Reverse DNS. It is advisable to make you Product ID from you application's Bundle ID and the feature name. In my case, it looks as follows:


For my application, I created two In-App products, whose Product IDs are com.wordpress.indiedevelop.InAppPurchasesExample.f1 and com.wordpress.indiedevelop.InAppPurchasesExample.f2, both non-consumables.
Step 5. Creating a test user
To test In-App Purchases, you need to create at least one test user:
- In iTunes Connect, select Manage Users, then select In App Purchase Test User.
- Click on Add New User.
- Enter the user information.
The test user's e-mail needn't be real. In my case, I created one test user:


Step 6. Programming
For my test application, I created a project framework and a User Interface:


For interacting with App Store, I recommend using the MKStoreKit framework (developed in 2009 by Mugunth Kumar), which makes handling StoreKit much easier. In addition to MKStoreKit, you need to add StoreKit.framework to your project.
In my case, I used a slightly modified MKStoreKit v. 1. To make my job easier, I added a delegate to the MKStoreManager class:
@protocol MKStoreKitDelegate @optional- (void)productAPurchased;- (void)productBPurchased;- (void)failed;@end
The delegate is to receive the message «productAPurchased» when Feature 1 is purchased; «productBPurchased», when Feature 1 is purchased; and «failed», when either the customer cancels the order or the purchase fails.
MKStoreKit's main class is the MKStoreManager singleton class. Here's its declaration:
@interface MKStoreManager : NSObject<SKProductsRequestDelegate> {...}// delegate@property (nonatomic, retain) id<MKStoreKitDelegate> delegate;// products available for purchase@property (nonatomic, retain) NSMutableArray *purchasableObjects;// factory method for Singleton+ (MKStoreManager*)sharedManager;// methods for feature buying- (void) buyFeatureA;- (void) buyFeatureB;// methods for checking whether the feature has been purchased+ (BOOL) featureAPurchased;+ (BOOL) featureBPurchased;...@end
Here's how the class is used in my test case:
First, I specified Product IDs for each feature in the MKStoreManager.m file.
static NSString *featureAId = @"com.wordpress.indiedevelop.InAppPurchasesExample.f1";static NSString *featureBId = @"com.wordpress.indiedevelop.InAppPurchasesExample.f2";
I also need to check whether application features have been purchased. As the main class inherits from UIViewController, it make sense to put the verification code into the viewDidLoad method:
- (void)viewDidLoad {[super viewDidLoad];[MKStoreManager sharedManager].delegate = self; // assigning the delegate for the MKStoreManager objectif ([MKStoreManager featureAPurchased]) // if feature 1 is purchased{feature1Button.hidden = YES; // hiding the Buy Feature 1 buttonseeFeature1Button.hidden = NO; // showing the Switch To Feature 1 button}if ([MKStoreManager featureBPurchased]) // if feature 2 is purchased{feature2Button.hidden = YES; // hiding the Buy Feature 2 buttonseeFeature2Button.hidden = NO; // showing the Switch To Feature 1 button}}
MKStoreKit uses NSUserDefaults for saving information on whether a product is purchased, so when the application is uninstalled, the information is lost. However, the user would not have to pay for the same feature twice as StoreKit would open access to the feature for free.
Now you need to implement the Purchase methods, which are bound to the TouchUpInside event by the following buttons:
-(IBAction)feature1ButtonPressed{[self showLockView]; // letting the user know about the download being done[[MKStoreManager sharedManager] buyFeatureA]; // sending the Buy Feature 1 message to the store}-(IBAction)feature2ButtonPressed{[self showLockView]; // letting the user know about the download being done[[MKStoreManager sharedManager] buyFeatureB]; // sending the Buy Feature 2 message to the store}
Here's how I implemented the MKStoreKitDelegate delegate methods:
// feature 1 is purchased- (void)productAPurchased{[self hideLockView]; // hiding the downloadfeature1Button.hidden = YES; // hiding the Buy buttonseeFeature1Button.hidden = NO; // showing the Switch button}// feature 2 is purchased- (void)productBPurchased{[self hideLockView]; // hiding the downloadfeature2Button.hidden = YES; // hiding the Buy buttonseeFeature2Button.hidden = NO; // showing the Switch button}// the purchase either failed or was cancelled- (void)failed{[self hideLockView]; // hiding the download}
I implemented the new features as separate UIView classes controlled by UIViewController, and the switchover to those features, using UINavigationController:
// switch to feature 1-(IBAction)seeFeature1{[self.navigationController pushViewController:feature1ViewController animated:YES];}// switch to feature 2-(IBAction)seeFeature2{[self.navigationController pushViewController:feature2ViewController animated:YES];}
When interacting with the store, you may also check its availability:
if ([SKPaymentQueue canMakePayments]){... // Show the store to the user}else{... // Tell the user that Purchases are unavailable}
As you can see, everything is rather simple. All that is remaining is to compile the code and to run some tests. :)
Step 7. Testing
To test In-App Purchases you need to compile, install and run the application. Please remember the following about the testing:
- Purchases must be tested on an actual device.
- Before you can start the test, quit iTunes on your iPhone: Settings -> Store -> Sign Out.
- When your test is running, you will see [Environment: sandbox] in the messages containing the offer to buy a feature, so that you know that's a test mode.
- You must use test accounts only (see Step 5) for your testing.
Test case: InAppPurchasesExample
As a result, I've got an application that can unlock two additional windows. You can use this application as an example for implementing your own In-App Purchase projects.


Hopefully, this article was useful for you. If you have any questions, please feel free to ask me — I'll be happy to answer.
Thứ Năm, 30 tháng 9, 2010
How to handle long tap even
This is my simple method to do this on touch began u have to get the point and store it as first and second that should be equal for future compare and then start timer, when the timer ends u have to compare first and second, if it equals then its long press!
And if the touches ends or moved u have to break timer as well as store the point as second point!!
some more detailed
And if the touches ends or moved u have to break timer as well as store the point as second point!!
some more detailed
Code:
- (void)touchesBegan:(NSSet *)touches withEvent:(UIEvent *)event{

UITouch *touch = [touches anyObject];
firstPoint=secondPoint = [touch locationInView:self];
//start timer
}

-(void)onTimerCall{

//check first and second point for equals if it equals its long tap

}

- (void)touchesEnded:(NSSet *)touches withEvent:(UIEvent *)event{

UITouch *touch = [touches anyObject];
secondPoint = [touch locationInView:self];

}

- (void)touchesMoved:(NSSet *)touches withEvent:(UIEvent *)event{

UITouch *touch = [touches anyObject];
secondPoint = [touch locationInView:self];
} Thứ Ba, 31 tháng 8, 2010
SQLite-Adding,Deleting,Updating
SQLite Tutorial - Adding data
Inserting data into SQLite database is a breeze with iPhone applications. In the third part of SQLite tutorials, I will show how to insert data into the database.
Introduction
Adding data into the database is very simple using the SQLite library, although there are some tweaks we have to perform if we want the application to behave in a certain way. This tutorial picks up its source code from the last tutorial in this series. This is how the "AddView" looks like
 The work flow is as following, a user will click on the "Add" button on the left hand bar button item and the "AddView" will be presented to him. The user will enter the coffee name and price and click on "Save" on the navigation item on the right hand side to save it. Internally, it will call "save_Clicked" method which will create a "Coffee" object and set all the right properties. We then call "add_Coffee" method on "SQLAppDelegate" which will call "add_Coffee" method on the "Coffee" class and then it will add the object to the array. We then dismiss the add view controller and reload data on the table view in "viewWillAppear" method implemented in "RootViewController.m".
Creating the addCoffee Method
First thing we do is create the addCoffee method in the Coffee class which is responsible for inserting data in the database.
This is how the header file looks like (Complete code not shown)
and the method is implemented in Coffee.m file
The "add_Stmt" is declared as static sqlite3_stmt variable. It is finalized in finalizeStatements and this is how the code looks like
Coming back to addCoffee method, "add_Stmt" is built using the appropriate insert SQL code. To bind the coffee name the following method sqlite3_bind_text is used and sqlite3_bind_double is used to bind the price variable to the insert statement. Since the method only accepts a value of datatype double, we send doubleValue message to the receiver. Execute the statement using sqlite_step method and if it returns SQLITE_DONE then the row was successfully added to the database. We still do not have the primary key for the row which was inserted, which we can get by calling sqlite3_last_insert_rowid method and passing the database object. The "rowid" is only returned on column of type INTEGER PRIMARY KEY.
After adding the data in the database, we have to add the coffee object to the coffeeArray declared in SQLAppDelegate class. To do this we will declare a method called "add_Coffee" which will take a parameter of type Coffee and this method is called from "save_Clicked" method, which is called when the user clicks on the save button.
This is how the header file changes (Full code not shown)
addCoffee is implemented in SQLAppDelegate.m file and this is the code listing
The first line calls the "addCoffee" method on the coffee object which we just created. The second line adds the object in the array.
Now we have to work with the Add View and its associated view controller.
Adding new UIView
Create a new view using the Interface Builder, I have named the view "AddView". Add two labels and two text boxes as shown in the figure below. For the text fields, Capitalize is set to "Words", Return Key is set to "Done" and set the Placeholder as "Coffee Name" and "Price" for the two respective text fields. You would set the properties in "Text Field Attributes" (Tools -> Inspector) using IB. Open "Connections Inspector" and create a connection from the delegate property to "File's Owner" object, do the same for both the text boxes. I find it hard to explain what goes in IB, so here is a screen shot of how it should look like. The "Text Field Connections" applies to both the text boxes.


Creating a UIViewController
Create a new view controller (using Xcode), the name of my file is "AddViewController". Create two variables of type UITextField with "IBOutlet" attribute so the variables show up in IB and create two methods called "save_Clicked" and "cancel_Clicked". This is how the header file should look like
Now that we have defined "AddViewController" set the File's Owner class as "AddViewController" in "Controller Identity", below is a screen shot of that.
 Also link the text fields declared in the view controller to the objects on the "AddView", below is a screen shot of that
 We are done with using Interface builder, feels good now that we can concentrate on code.
We now have to add two buttons "Cancel" and "Save" on the "UINavigationItem" of the "AddView". Let us do this in "viewDidLoad" method and this how the code looks like
Everything is self explanatory, we set the title, add two buttons and set the background of the view by passing groupTableViewBackgroundColor message to UIColor.
Since the view has only two text fields, it will be easier if the keypad is presented to the user when the view is loaded. Lets do this in "viewWillAppear" method and this is how the code looks like
Here we always set the text property of the text fields to empty string and we make the keypad show up for the coffeeName text field by passing becomeFirstResponder message.
Since the user can click "Done" the keyboard should be hidden and the method which gets called is textFieldShouldReturn and this is how the code looks like
Please note that, I send "resignFirstResponder" message to the text field without finding out which textbox should be hidden. I do this because, the actual save happens in "save_clicked" method.
Before we look at "save_Clicked" method, this is how "cancel_Clicked" method looks like
and this is how the "save_Clicked" method looks like
We create a new coffee class and set all the properties, isDetailViewHydrated is set as YES because all the data is in memory and isDirty is set as NO because the row will be inserted in the database after setting all the properties. The view is dismissed by passing "dismissModalViewControllerAnimated" message to the receiver.
We still have to add the "Add" button to the "RootViewController" and add the code to show the "AddView". This is how the header file changes for "RootViewController"
Do not forget to import "AddViewController.h" in "RootViewController.m" file. The "Add" button is added in the "viewDidLoad" method and this is how the code changes
When "Add" is clicked "add_Clicked" method is called and this is how the code looks like
The reason we present the "AddView" using "addNavigationController" because when we want a custom UINavigationItem to show up on the AddView and that is why we initialize "addNavigationController" with "avController" and present it using "presentModalViewController".
Run your application to insert data in the database.
There is however a problem with the design here, a User can click on Edit and nothing restricts him/her from clicking the add button. The code below fixes the issue
The method setEditing is called when the edit button is clicked. We send the same message to the parent class and the tableview, also disable or enable the leftBarButtonItem if the tableview is in edit mode.
Conclusion
As we can see inserting data in SQLite databases is very easy to do.
Happy Programming,
iPhone SDK Articles
Attachments
Suggested Readings
Introduction
Adding data into the database is very simple using the SQLite library, although there are some tweaks we have to perform if we want the application to behave in a certain way. This tutorial picks up its source code from the last tutorial in this series. This is how the "AddView" looks like
The work flow is as following, a user will click on the "Add" button on the left hand bar button item and the "AddView" will be presented to him. The user will enter the coffee name and price and click on "Save" on the navigation item on the right hand side to save it. Internally, it will call "save_Clicked" method which will create a "Coffee" object and set all the right properties. We then call "add_Coffee" method on "SQLAppDelegate" which will call "add_Coffee" method on the "Coffee" class and then it will add the object to the array. We then dismiss the add view controller and reload data on the table view in "viewWillAppear" method implemented in "RootViewController.m".Creating the addCoffee Method
First thing we do is create the addCoffee method in the Coffee class which is responsible for inserting data in the database.
This is how the header file looks like (Complete code not shown)
- (void) addCoffee;and the method is implemented in Coffee.m file
- (void) addCoffee {

if(addStmt == nil) {
const char *sql = "insert into Coffee(CoffeeName, Price) Values(?, ?)";
if(sqlite3_prepare_v2(database, sql, -1, &addStmt, NULL) != SQLITE_OK)
NSAssert1(0, @"Error while creating add statement. '%s'", sqlite3_errmsg(database));
}

sqlite3_bind_text(addStmt, 1, [coffeeName UTF8String], -1, SQLITE_TRANSIENT);
sqlite3_bind_double(addStmt, 2, [price doubleValue]);

if(SQLITE_DONE != sqlite3_step(addStmt))
NSAssert1(0, @"Error while inserting data. '%s'", sqlite3_errmsg(database));
else
//SQLite provides a method to get the last primary key inserted by using sqlite3_last_insert_rowid
coffeeID = sqlite3_last_insert_rowid(database);

//Reset the add statement.
sqlite3_reset(addStmt);
}
The "add_Stmt" is declared as static sqlite3_stmt variable. It is finalized in finalizeStatements and this is how the code looks like
//Complete code listing not shown
#import "Coffee.h"

static sqlite3 *database = nil;
static sqlite3_stmt *deleteStmt = nil;
static sqlite3_stmt *addStmt = nil;

@implementation Coffee
...
+ (void) finalizeStatements {

if(database) sqlite3_close(database);
if(deleteStmt) sqlite3_finalize(deleteStmt);
if(addStmt) sqlite3_finalize(addStmt);
}
Coming back to addCoffee method, "add_Stmt" is built using the appropriate insert SQL code. To bind the coffee name the following method sqlite3_bind_text is used and sqlite3_bind_double is used to bind the price variable to the insert statement. Since the method only accepts a value of datatype double, we send doubleValue message to the receiver. Execute the statement using sqlite_step method and if it returns SQLITE_DONE then the row was successfully added to the database. We still do not have the primary key for the row which was inserted, which we can get by calling sqlite3_last_insert_rowid method and passing the database object. The "rowid" is only returned on column of type INTEGER PRIMARY KEY.
After adding the data in the database, we have to add the coffee object to the coffeeArray declared in SQLAppDelegate class. To do this we will declare a method called "add_Coffee" which will take a parameter of type Coffee and this method is called from "save_Clicked" method, which is called when the user clicks on the save button.
This is how the header file changes (Full code not shown)
//FileName: SQLAppDelegate.h
- (void) addCoffee:(Coffee *)coffeeObj;
...
addCoffee is implemented in SQLAppDelegate.m file and this is the code listing
- (void) addCoffee:(Coffee *)coffeeObj {

//Add it to the database.
[coffeeObj addCoffee];

//Add it to the coffee array.
[coffeeArray addObject:coffeeObj];
}
The first line calls the "addCoffee" method on the coffee object which we just created. The second line adds the object in the array.
Now we have to work with the Add View and its associated view controller.
Adding new UIView
Create a new view using the Interface Builder, I have named the view "AddView". Add two labels and two text boxes as shown in the figure below. For the text fields, Capitalize is set to "Words", Return Key is set to "Done" and set the Placeholder as "Coffee Name" and "Price" for the two respective text fields. You would set the properties in "Text Field Attributes" (Tools -> Inspector) using IB. Open "Connections Inspector" and create a connection from the delegate property to "File's Owner" object, do the same for both the text boxes. I find it hard to explain what goes in IB, so here is a screen shot of how it should look like. The "Text Field Connections" applies to both the text boxes.
Creating a UIViewController
Create a new view controller (using Xcode), the name of my file is "AddViewController". Create two variables of type UITextField with "IBOutlet" attribute so the variables show up in IB and create two methods called "save_Clicked" and "cancel_Clicked". This is how the header file should look like
#import

@class Coffee;

@interface AddViewController : UIViewController {

IBOutlet UITextField *txtCoffeeName;
IBOutlet UITextField *txtPrice;
}

@end
Now that we have defined "AddViewController" set the File's Owner class as "AddViewController" in "Controller Identity", below is a screen shot of that.
Also link the text fields declared in the view controller to the objects on the "AddView", below is a screen shot of thatWe are done with using Interface builder, feels good now that we can concentrate on code.We now have to add two buttons "Cancel" and "Save" on the "UINavigationItem" of the "AddView". Let us do this in "viewDidLoad" method and this how the code looks like
- (void)viewDidLoad {
[super viewDidLoad];

self.title = @"Add Coffee";

self.navigationItem.leftBarButtonItem = [[[UIBarButtonItem alloc]
  initWithBarButtonSystemItem:UIBarButtonSystemItemCancel
   target:self action:@selector(cancel_Clicked:)] autorelease];

self.navigationItem.rightBarButtonItem = [[[UIBarButtonItem alloc]
   initWithBarButtonSystemItem:UIBarButtonSystemItemSave
   target:self action:@selector(save_Clicked:)] autorelease];

self.view.backgroundColor = [UIColor groupTableViewBackgroundColor];
}
Everything is self explanatory, we set the title, add two buttons and set the background of the view by passing groupTableViewBackgroundColor message to UIColor.
Since the view has only two text fields, it will be easier if the keypad is presented to the user when the view is loaded. Lets do this in "viewWillAppear" method and this is how the code looks like
- (void) viewWillAppear:(BOOL)animated {
[super viewWillAppear:animated];

//Set the textboxes to empty string.
txtCoffeeName.text = @"";
txtPrice.text = @"";

//Make the coffe name textfield to be the first responder.
[txtCoffeeName becomeFirstResponder];
}
Here we always set the text property of the text fields to empty string and we make the keypad show up for the coffeeName text field by passing becomeFirstResponder message.
Since the user can click "Done" the keyboard should be hidden and the method which gets called is textFieldShouldReturn and this is how the code looks like
- (BOOL)textFieldShouldReturn:(UITextField *)theTextField {

[theTextField resignFirstResponder];
return YES;
}
Please note that, I send "resignFirstResponder" message to the text field without finding out which textbox should be hidden. I do this because, the actual save happens in "save_clicked" method.
Before we look at "save_Clicked" method, this is how "cancel_Clicked" method looks like
- (void) cancel_Clicked:(id)sender {

//Dismiss the controller.
[self.navigationController dismissModalViewControllerAnimated:YES];
}
and this is how the "save_Clicked" method looks like
- (void) save_Clicked:(id)sender {

SQLAppDelegate *appDelegate = (SQLAppDelegate *)[[UIApplication sharedApplication] delegate];

//Create a Coffee Object.
Coffee *coffeeObj = [[Coffee alloc] initWithPrimaryKey:0];
coffeeObj.coffeeName = txtCoffeeName.text;
NSDecimalNumber *temp = [[NSDecimalNumber alloc] initWithString:txtPrice.text];
coffeeObj.price = temp;
[temp release];
coffeeObj.isDirty = NO;
coffeeObj.isDetailViewHydrated = YES;

//Add the object
[appDelegate addCoffee:coffeeObj];

//Dismiss the controller.
[self.navigationController dismissModalViewControllerAnimated:YES];
}
We create a new coffee class and set all the properties, isDetailViewHydrated is set as YES because all the data is in memory and isDirty is set as NO because the row will be inserted in the database after setting all the properties. The view is dismissed by passing "dismissModalViewControllerAnimated" message to the receiver.
We still have to add the "Add" button to the "RootViewController" and add the code to show the "AddView". This is how the header file changes for "RootViewController"
#import

@class Coffee, AddViewController;

@interface RootViewController : UITableViewController {

SQLAppDelegate *appDelegate;
AddViewController *avController;
UINavigationController *addNavigationController;
}

@end
Do not forget to import "AddViewController.h" in "RootViewController.m" file. The "Add" button is added in the "viewDidLoad" method and this is how the code changes
- (void)viewDidLoad {
[super viewDidLoad];

self.navigationItem.rightBarButtonItem = self.editButtonItem;

self.navigationItem.leftBarButtonItem = [[UIBarButtonItem alloc]
 initWithBarButtonSystemItem:UIBarButtonSystemItemAdd
 target:self action:@selector(add_Clicked:)];

appDelegate = (SQLAppDelegate *)[[UIApplication sharedApplication] delegate];

self.title = @"Coffee List";
}
When "Add" is clicked "add_Clicked" method is called and this is how the code looks like
- (void) add_Clicked:(id)sender {

if(avController == nil)
avController = [[AddViewController alloc] initWithNibName:@"AddView" bundle:nil];

if(addNavigationController == nil)
addNavigationController = [[UINavigationController alloc] initWithRootViewController:avController];

[self.navigationController presentModalViewController:addNavigationController animated:YES];
}
The reason we present the "AddView" using "addNavigationController" because when we want a custom UINavigationItem to show up on the AddView and that is why we initialize "addNavigationController" with "avController" and present it using "presentModalViewController".
Run your application to insert data in the database.
There is however a problem with the design here, a User can click on Edit and nothing restricts him/her from clicking the add button. The code below fixes the issue
- (void)setEditing:(BOOL)editing animated:(BOOL)animated {

[super setEditing:editing animated:animated];
  [self.tableView setEditing:editing animated:YES];

//Do not let the user add if the app is in edit mode.
if(editing)
 self.navigationItem.leftBarButtonItem.enabled = NO;
else
 self.navigationItem.leftBarButtonItem.enabled = YES;
}
The method setEditing is called when the edit button is clicked. We send the same message to the parent class and the tableview, also disable or enable the leftBarButtonItem if the tableview is in edit mode.
Conclusion
As we can see inserting data in SQLite databases is very easy to do.
Happy Programming,
iPhone SDK Articles
Attachments
Suggested Readings
- SQLite Tutorial - Deleting data
- SQLite Tutorial - Inserting data into SQLite database
- SQLite Tutorial - Saving images in the SQLite database
SQLite-ToDo List
Creating a ToDo List Using SQLite Part 1
If you're new here, you may want to subscribe to my RSS feed. Thanks for visiting!
If you have been following my tutorials, you know that we have been working primarily with UITableViews. This is mostly because SO many applications can be developed using this simple control. This final UITableView tutorial will be taking all of the skills learned from previous tutorials, putting them all together, and adding SQLite to create a prioritized To-Do list. I will also be showing you how to add multiple columns to your table cells and we will be exploring some of the other controls that the iPhone has to offer. What good would the tutorials be if we didn’t use them to create something useful.
I will move a little faster in this tutorial while still explaining the new stuff in detail. I will assume that you have completed the fruits tutorial and it’s prerequisites.
This tutorial will be a multipart series as it will be a little longer than my previous ones. In this first tutorial, you will learn:
- Create a NavigationBased Application
- Create a Database
- Add the Database to Your Project
- Add the SQLite3 Framework
- Create a Todo Class Object
- Initialize the Database
So let’s get started…
Open up X-Code and Select File->New Project… Select Navigation-Based Application and click Choose…

Name your project todo. Now let’s create the todo database that we will be using. Open up the Terminal application on your Mac. This is located in Applications > Utilities.
If you have installed XCode, you should have mysqlite3 already on your computer. To check this, type:
sqlite3 into the Terminal and sqlite3 should start. Type .quit to exit. If sqlite3 is not installed, install all of the XTools from your Mac Installation Disk.
Now that the terminal is open let’s create the database. This is done with the command:
sqlite3 todo.sqlite
SQLite3 will now start and load the todo.sqlite database. By default the database is empty and contains no tables. If you need a refresher on the basics of SQL databases Google It. Since our application is fairly simple, we only need to create one table. We will create a table called todo by typing the following statement:
CREATE TABLE todo(pk INTEGER PRIMARY KEY, text VARCHAR(25), priority INTEGER, complete BOOLEAN);
One thing to note here is the pk field. It is the primary key of the table. This adds functionality such that every time a row is added to the database, it auto-increments this field. This will be a unique identifier to identify each row. All of the other fields should be fairly self explanitory.
Now that our table has been created, let’s add some data. We will eventually be adding todo items within our app, but for now we will add some defaults. Type the following commands below.
INSERT INTO todo(text,priority,complete) VALUES('Take out the trash',3,0);

INSERT INTO todo(text,priority,complete) VALUES('Do Computer Science homework',1,0);

INSERT INTO todo(text,priority,complete) VALUES('Learn Objective C',1,0);

INSERT INTO todo(text,priority,complete) VALUES('DIGG this tutorial',2,0);
You can add as many todo items as you would like. For this tutorial, make sure you enter a priority between 1 and 3 (You’ll see why later). Now our database has been created and populated let’s exit out of SQLite3. Do this by typing .quit. Your terminal window should look something like this.

Now go back to XCode. Do a Control-Click (right click) on the folder named Resources. Click Add -> Existing Files… and browse to your todo.sqlite file and click Add. It will then prompt you with a screen like this.

Make sure you check the box that says Copy items into destination group’s folder (if needed). You should now see the todo.sqlite file inside of the resource folder.

Now that we have added the database, we need to load the Objective C libraries so we can use it. Do a control-click (right click) on the Frameworks folder. Click Add -> Existing Frameworks. Now this part is a little strange. It has been my experience that these libraries are not in the same place on all machines. So in the search bar type in libsqlite3. The file we are looking for is called libsqlite3.0.dylib. This may pull up multiple files as OSX has it’s own versions of this file. Just click on the largest of the files that show up and click Add. As you can see, mine is about 1.7 MB.

Now it should add the framework and your directory will look something like this:

We need to create an object to hold our todo information. We will eventually be making an array of these objects to populate a UITableView. Go ahead and click File -> New File… Select NSObject Subclass and click Next.

Name this object todo.m and check the box that says Also create “Todo.h” and click Finish.

Open up todo.h and add the following code.

We see some new things here…First, there is a variable of type sqlite3 called database. This will be a reference to the applications database and will allow the todo object to communicate with it. Make sure you add a #import
Next, we see a primary key. Notice that in the property declaration it has the keywords assign and readonly. This tells the compiler that this variable, once assiged, can not be changed again. This is good since each todo will be uniquely identified by this variable.
Also, I have declared a method called initWithPrimaryKey. This will be the contstructor for this object. It takes an integer to assign as the primary key and an sqlite3 object to use as the database reference.
Let’s implement this method…Open up todo.m and add the following code.

Advertisement 
There are quite a few new things that need to be explained here. I will just go through it line by line.
static sqlite3_stmt *init_statement = nil
This will hold our initialize statement when retrieving todo data from the database. This statement is static, meaning it is independent of any instance. In other words, there will be only one of them no matter how many todo objects we create. This statement will get compiled and allow us to do some neat things. I’ll explain more in a bit.
The next lines makes sure that the super class (NSObject) initilizes properly before we initilize a todo object. We then set the local primary key and database objects to the parameters passed to the initWithPrimaryKey method.
Now some interesting stuff happens. The next lines checks if our init_statment is null. This will happen only once per launch of the application. If it is null, we create a new string containing an SQL statement. If you are familiar with SQL at all, this should look pretty familiar with one exception. What is a question mark doing in there? Well, I will tell you. After the SQL statement gets compiled, we can bind a value to it that will eventually replace the question mark. So this allows us to have 1 generic SQL statement, but bind different values to it to retrieve different results. So the next line, you guessed it, prepares the statement and stores it in our init_statement. The if statement just checks to see if this finished correctly and prints an error if there was a problem.
Moving on… The line sqlite3_bind_int simply replaces that question mark with the primary key of the current todo object, so what we end up with is statements like this:
SELECT text FROM todo WHERE pk = 1;

SELECT text FROM todo WHERE pk = 2;

SELECT text FROM todo WHERE pk = 3;

SELECT text FROM todo WHERE pk = n;
After that, the sqlite3_step(init_statement) method is called. This method executes the SQL statement on the database. It is contained inside of an if statement to make sure it executed properly. Now we can finally access the todo data. We see this line:
self.text = [NSString stringWithUTF8String:(char*) sqlite3_column_text(init_statement,0)];
Wow, that’s a mouthful… Let’s analyze it. The sqlite3_column_text method tells SQL that we want to retrieve a string object from the database. It has 2 parameters. The first, is just a reference to the SQL statement that was used. The second is the column number that we wish to get text from. So in this case, we only have one column (SELECT text FROM…) so there is only 1 index and that’s the 0th index. Next, the (char *) is just a cast to a string (might not be needed, but good practice). And finally, we build an NSString object with the data returned so that we can assign self.text to it.
This is quite a bit to explain in just text. If I have lost you, feel free to ask me questions in the comments.
We are done with the todo object for now…
Go ahead and open up todoAppDelegate.h and add the following code.

This should look a little familiar with the exception of a few lines. Notice that I have created an NSMutableArray of todo objects. This will be (like the fruit example) an array to hold our todo items. We will eventually use this array to populate a UITableView. The only new lines here are the import of sqlite3.h and the sqlite3 *database line. Now let’s open up todoAppDelegate.m and add some code.

One new thing we see here is a private interface. We declared it here because it’s specific to this object so it does not need to be declared in the .h file. The 2 functions we will implement are createEditableCopyOfDatabaseIfNeeded and initializeDatabase. Much of the code for these has already been written for us inside of Apple’s SQLBooks tutorial. I will going through this code and explaining it the best that I can. Add the following code.

What this method is essentially doing is copying the database from your project folder to the documents folder on your iPhone. This will only happen once as it first checks if the database already exists in the documents folder. I’m not going to go through this line by line as it is fairly self explanitory. Apple does a great job of naming functions and variables so that we can understand what is going on. If I get enough requests in the comments, I’ll do a line-by-line writup of this function.

The next function we will implement is initializeDatabase. Add the following code:

That’s a lot of text! Don’t worry it’s mostly comments. Let’s analyze this code…Some of it is very similar to the fruits example.
The first line creates and initializes a NSMutableArray. We then go on to set this array to our object’s todos array and release the temporary object.
The next 3 lines locate the database we created inside of the documents folder. Following that, the sqlite3_open line open’s the database so we can access its data. If the database opens correctly, we then proceed to retrieve todo items. The first line:
const char *sql = "SELECT pk FROM todo";
is an SQL statement that we will use to get all of the primary keys from the database. We then prepare the statement (as we did inside the todo.m file) only this time there is no “?” in the statement. That is because there is not condition for retrieving the primary keys. We are simply saying “give me all of the primary keys in the database”.
Now we see a while loop that is stepping through the SQL results. Every time we call sqlite3_step, the next result gets retrieved. The line:
int primaryKey = sqlite3_column_int(statement,0);
retrieves the primary key from each result. This is very similar to retrieving the text in the todo.m class only we use the sqlite3_column_int method instead of the sqlite3_column_text method. This is done for obvious reasons.
After we have the primary key, we create a new Todo object and call the initWithPrimaryKey constructor that we created. The primary key gets passed as well as a reference to the database. This allows the Todo object to essentially “look itself up” in the database. Finally, we add the newly created Todo object to our array of todos.
The last statement sqlite3_finalize clears the statement from memory and does some other cleanup.
The last part of this tutorial is calling these functions to create and initialize the database. So add the following code to applicationDidFinishLaunching:

We are simply calling these functions. You can now click Build and Go but your application won’t display anything! You might be quite frustrated that you completed this portion of the tutorial and have yet to see anything. Well, stay tuned! I will have the next portion of this tutorial up soon.
For you ambitious programmers you could move on. If you notice, at this point we are in a similar situation as the fruit tutorial. We have an Array of objects that will eventually populate a UITableView.
This tutorial will be a 4 part series and I will show you how to use a few more controls. We will be adding, editing, and deleting todo items. If you have any questions, please leave them in the comments. Also, if you get lost you can download the sample code here
Happy iCoding!
iPhone SDK Tutorial: Reading data from a SQLite Database
iPhone SDK Tutorial: Reading data from a SQLite Database
September 21, 2008 | 162 comments | iPhone Development Tutorials, xcode
I see many people asking for SQLite tutorials around, and since I am using SQLite for the next part in the Advanced RSS Reader Tutorial, I thought I would write up a quick tutorial on using SQLite with the iPhone SDK.
1. Project Requirements
I suggest that you have at least a basic understanding of SQLite, writing SQL statements, the XCode interface and using the terminal in OSX. If you don’t know anything about any of these topics then this tutorial probably isn’t for you.
2. Creating our SQLite database for our tutorial
We first need to create a database for use with our application. For the purposes of this tutorial we will be building a database of animals along with a little information on them and a picture.
Fire up a new Terminal window and make a new folder to store the database in, here are the commands I ran
cd /Users/lookaflyingdonkey/Documents
mkdir SQLiteTutorial
cd SQLiteTutorial
sqlite3 AnimalDatabase.sql
You should now be at a “sqlite” command prompt, this is where we will be building our database structure and entering some test data.
For our example we need the name of the animal, a short description and a link to an image. Follow the commands below to create the table and to enter some sample data.
CREATE TABLE animals ( id INTEGER PRIMARY KEY, name VARCHAR(50), description TEXT, image VARCHAR(255) );

INSERT INTO animals (name, description, image) VALUES ('Elephant', 'The elephant is a very large animal that lives in Africa and Asia', 'http://dblog.com.au/wp-content/elephant.jpg');
INSERT INTO animals (name, description, image) VALUES ('Monkey', 'Monkies can be VERY naughty and often steal clothing from unsuspecting tourists', 'http://dblog.com.au/wp-content/monkey.jpg');
INSERT INTO animals (name, description, image) VALUES ('Galah', 'Galahs are a wonderful bird and they make a great pet (I should know, I have one)', 'http://dblog.com.au/wp-content/galah.jpg');
INSERT INTO animals (name, description, image) VALUES ('Kangaroo', 'Well I had to add the Kangaroo as they are the essence of the Australian image', 'http://dblog.com.au/wp-content/kangaroo.jpg');
The first command will create the table with the required structure and the next four will insert some test data for us to work with. To ensure that you have entered the data correctly you can execute “SELECT * FROM animals;” and see if it returns the items above. Once you are confident that everything had been created successfully you can leave the sqlite command line by typing “.quit”.
3. Creating our Project
Now that our database is all ready to go we need to setup our X-Code project.
Start off by creating a new “Navigation-Based Application”.
Give your Project a name, I called mine “SQLiteTutorial”.
Now set your screen layout to how you prefer it, I suggest making the window as large as possible, and making the code view as tall as possible by dragging the horizontal slider to the top. This will allow you the most room to move when building your application.
Now its time to create the required classes and views for our application, we will start off by making our views.
Right Click on the “Resources” folder in the left hand pane and click “Add File”, we want to create a new “View XIB” under the “User Interfaces” group.
We now need to give it a name, to stick the Apple’s naming conventions we are going to call it “AnimalViewController.xib”, Now Click “Finish”.
Now we need to create two classes, the first one will represent an animal, right click on the “Classes” folder in the left hand pane, click “Add > New File…”, choose the “NSObject subclass” template under the “Cocoa Touch Classes” group and name it “Animal”.
The second class will be for our AnimalsViewController, right click on the “Classes” folder in the left hand pane, click “Add > New File…”, choose the “UIViewController subclass” under the “Cocoa Touch Classes” group and name it “AnimalViewController”.
4. Adding SQLite Framework and our Animal Database
Now that we have created all of our views and classes it is time to start the real grunt work.
First off we need to include the SQLite libraries so our application can utilise them. To do this you will need to right click on the “Frameworks” folder in the left hand pane, then click on “Add > Existing Frameworks…”, then navigate to “/Developer/Platforms/iPhoneOS.platform/Developer/SDKs/iPhoneOS2.0.sdk/usr/lib/” and double click the “libsqlite3.0.dylib” file. A popup will appear, just click “Add” and the library will be added to your project.
We also need to add our database we created earlier to the Resources folder, to do this simply right click on the “Resources” folder, click “Add > Existing Files…”, navigate to the location you created the database in then double click on the AnimalDatabase.sql file. Another popup will appear, just click add.
All done with the importing, time to code!
5. The Coding begins!
We are going to start the coding by building our “Animal” object, every animal will have 3 properties, a name, a description and an image URL.
Open up the “Animal.h” file from the “Classes” folder and edit its contents to look like below,
#import

@interface Animal : NSObject {
 NSString *name;
 NSString *description;
 NSString *imageURL;
}

@property (nonatomic, retain) NSString *name;
@property (nonatomic, retain) NSString *description;
@property (nonatomic, retain) NSString *imageURL;

-(id)initWithName:(NSString *)n description:(NSString *)d url:(NSString *)u;

@end
Most of the above code should be pretty familiar to you, the only thing that may not be is the initWithName line, this line will allow us to create a new object with the required data, we could have used the default init function, but it will be easier for us to define our own.
Now we will actually have to implement the Animal Object, open up the “Animal.m” file and edit its contents to look like below:
#import "Animal.h"

@implementation Animal
@synthesize name, description, imageURL;

-(id)initWithName:(NSString *)n description:(NSString *)d url:(NSString *)u {
 self.name = n;
 self.description = d;
 self.imageURL = u;
 return self;
}
@end
The above code should be pretty easy to read as well, it basically stores the supplied data from the initWithName function and return the object (self).
Now its time to setup the Application delegate to access the database.
Open up the “SQLiteTutorialAppDelegate.h” and edit its contents to look like below:
#import
#import// Import the SQLite database framework
@interface SQLiteTutorialAppDelegate : NSObject{
UIWindow *window;
UINavigationController *navigationController;
// Database variables
NSString *databaseName;
NSString *databasePath;
// Array to store the animal objects
NSMutableArray *animals;
}
@property (nonatomic, retain) IBOutlet UIWindow *window;
@property (nonatomic, retain) IBOutlet UINavigationController *navigationController;
@property (nonatomic, retain) NSMutableArray *animals;
@end
What we are doing here is importing the SQLite database framework and creating some variables for storing the database details and an array of animal objects.
Now open up the “SQLiteTutorialAppDelegate.m” file and edit its contents to look like below:
#import "SQLiteTutorialAppDelegate.h"
#import "RootViewController.h"
#import "Animal.h" // Import the animal object header

@implementation SQLiteTutorialAppDelegate

@synthesize window;
@synthesize navigationController;
@synthesize animals; // Synthesize the aminals array

- (void)applicationDidFinishLaunching:(UIApplication *)application {
 // Setup some globals
 databaseName = @"AnimalDatabase.sql";

 // Get the path to the documents directory and append the databaseName
 NSArray *documentPaths = NSSearchPathForDirectoriesInDomains(NSDocumentDirectory, NSUserDomainMask, YES);
 NSString *documentsDir = [documentPaths objectAtIndex:0];
 databasePath = [documentsDir stringByAppendingPathComponent:databaseName];

 // Execute the "checkAndCreateDatabase" function
 [self checkAndCreateDatabase];

 // Query the database for all animal records and construct the "animals" array
 [self readAnimalsFromDatabase];

 // Configure and show the window
 [window addSubview:[navigationController view]];
 [window makeKeyAndVisible];
}

- (void)applicationWillTerminate:(UIApplication *)application {
 // Save data if appropriate
}

- (void)dealloc {
 [animals release];
 [navigationController release];
 [window release];
 [super dealloc];
}

-(void) checkAndCreateDatabase{
 // Check if the SQL database has already been saved to the users phone, if not then copy it over
 BOOL success;

 // Create a FileManager object, we will use this to check the status
 // of the database and to copy it over if required
 NSFileManager *fileManager = [NSFileManager defaultManager];

 // Check if the database has already been created in the users filesystem
 success = [fileManager fileExistsAtPath:databasePath];

 // If the database already exists then return without doing anything
 if(success) return;

 // If not then proceed to copy the database from the application to the users filesystem

 // Get the path to the database in the application package
 NSString *databasePathFromApp = [[[NSBundle mainBundle] resourcePath] stringByAppendingPathComponent:databaseName];

 // Copy the database from the package to the users filesystem
 [fileManager copyItemAtPath:databasePathFromApp toPath:databasePath error:nil];

 [fileManager release];
}

-(void) readAnimalsFromDatabase {
 // Setup the database object
 sqlite3 *database;

 // Init the animals Array
 animals = [[NSMutableArray alloc] init];

 // Open the database from the users filessytem
 if(sqlite3_open([databasePath UTF8String], &database) == SQLITE_OK) {
  // Setup the SQL Statement and compile it for faster access
  const char *sqlStatement = "select * from animals";
  sqlite3_stmt *compiledStatement;
  if(sqlite3_prepare_v2(database, sqlStatement, -1, &compiledStatement, NULL) == SQLITE_OK) {
   // Loop through the results and add them to the feeds array
   while(sqlite3_step(compiledStatement) == SQLITE_ROW) {
    // Read the data from the result row
    NSString *aName = [NSString stringWithUTF8String:(char *)sqlite3_column_text(compiledStatement, 1)];
    NSString *aDescription = [NSString stringWithUTF8String:(char *)sqlite3_column_text(compiledStatement, 2)];
    NSString *aImageUrl = [NSString stringWithUTF8String:(char *)sqlite3_column_text(compiledStatement, 3)];

    // Create a new animal object with the data from the database
    Animal *animal = [[Animal alloc] initWithName:aName description:aDescription url:aImageUrl];

    // Add the animal object to the animals Array
    [animals addObject:animal];

    [animal release];
   }
  }
  // Release the compiled statement from memory
  sqlite3_finalize(compiledStatement);

 }
 sqlite3_close(database);

}

@end
Now I know that may look like a fair bit of code and it probably also looks quite scary! But really it is quite simple and I have tried to comment nearly every line to describe to you what the line does and why it is there.
The checkAndCreateDatabase function checks to see if we have already copied our database from the application bundle to the users filesystem (in their documents folder), if the database hasn’t already been created or it has been removed for some reason it will be recreated from the default database.
Next the readAnimalsFromDatabase function will make a connection to the database that is stored in the users documents folder, and then executes the SQL statement “SELECT * FROM animals”. It will then go through each row that is returned and it will extract the name, description and imageURL from the result and build an Animal object for each. You will see the “sqlite3_column_text” function used here, there are many more of these for returning other field types such as “sqlite3_column_int” for integers, “sqlite3_column_blob” for blobs or “sqlite3_column_value” to get an unknown value.
Now that we have the data in our array and we have it in our known format we are ready to start displaying it.
Open up the “RootViewController.m” file and edit the numberOfRowsInSection to look like the following:
SQLiteTutorialAppDelegate *appDelegate = (SQLiteTutorialAppDelegate *)[[UIApplication sharedApplication] delegate];
return appDelegate.animals.count;
What this does is it creates a link to the application delegate, and then the second line returns the size f the animals array in out Application delegate, this array was filled previously from the SQLite database.
Now in the cellForRowAtIndexPath function you will need at change it to look like the following:
- (UITableViewCell *)tableView:(UITableView *)tableView cellForRowAtIndexPath:(NSIndexPath *)indexPath {

   static NSString *CellIdentifier = @"Cell";

   UITableViewCell *cell = [tableView dequeueReusableCellWithIdentifier:CellIdentifier];
   if (cell == nil) {
       cell = [[[UITableViewCell alloc] initWithFrame:CGRectZero reuseIdentifier:CellIdentifier] autorelease];
   }

   // Set up the cell
   SQLiteTutorialAppDelegate *appDelegate = (SQLiteTutorialAppDelegate *)[[UIApplication sharedApplication] delegate];
 Animal *animal = (Animal *)[appDelegate.animals objectAtIndex:indexPath.row];

 [cell setText:animal.name];
 return cell;
}
We pretty much just added 3 lines under the “// Set up the cell” line, the first one is the same as we added previously to access the application delegate. The second line creates a new Animal object based on the array from the application delegate, it will be used to create a row for each individual record in the database. On the final line we are just setting the text of the cell to the name field from the Animal object.
You can now run the program and you should see a table view with the 4 animals we added to the database, if you added more than my default animals you should see them in here as well.
We will now setup the AnimalViewController, open up the “AnimalViewController.h” file and edit its contents to below:
#import

@interface AnimalViewController : UIViewController {
 IBOutlet UITextView *animalDesciption;
 IBOutlet UIImageView *animalImage;
}

@property (nonatomic, retain) IBOutlet UITextView *animalDesciption;
@property (nonatomic, retain) IBOutlet UIImageView *animalImage;

@end
What we are doing above is adding an outlet for the description and image for the Animal, we will use these later on when we link the view up.
Now open up the “AnimalViewController.m” file and add a synthesize call for for the description and image, this will go under the “@implementation AnimalViewController” line, like so:
#import "AnimalViewController.h"

@implementation AnimalViewController

@synthesize animalDesciption, animalImage;
Now it is time to make the detailed view page appear when you select a record. Open up the “AnimalViewController.xib” file from the resources folder and the interface builder should appear.
The first thing we need to do is to set the File’s Owner Class to AnimalViewController, this is done by selecting the “File’s Owner” item in the main window and then clicking Tools > Identity Inspector in the top menu, and then selecting AnimalViewController from the class dropdown.
Your inspector window should now look like this:
We are going to be using a UITextView for the description (as it will allow for word wrapping and scrolling in the case that the description is quite large) and a UIImageView to display the image. I have laid mine out like below:
Now that we have everything laid out it is time to link them all up, start by holding control and click+drag from the “File’s Owner” to the “View” objects, a little gray menu will appear and you will need to select view. Now hold control and click+drag from the “File’s Owner” to the UITextView in the layout window, you should see “animalDescription” in the popup list, select it. Repeat this process for the UIImageView and you should see animalImage appear, select it also.
Now save the interface and close the interface builder.
Nearly done! All we have to do now is to setup the code for when a user presses on a record in the table view.
Open up the “RootViewController.h” file and edit its contents to below:
#import
#import "AnimalViewController.h"

@interface RootViewController : UITableViewController {
 AnimalViewController *animalView;
}

@property(nonatomic, retain) AnimalViewController *animalView;

@end
We are creating an instance of the AnimalViewController to be used bu the RootViewController when a user presses on an item.
Now open up the “RootViewController.m” file and edit the top part of the file to look like below:
#import "RootViewController.h"
#import "SQLiteTutorialAppDelegate.h"
#import "Animal.h"

@implementation RootViewController
@synthesize animalView;
This will just synthesize the animalView that we just added.
First up lets set the default title of our view, to do this you need to uncomment the viewDidLoad function, and edit it to below:
- (void)viewDidLoad {
   [super viewDidLoad];
   // Uncomment the following line to add the Edit button to the navigation bar.
   // self.navigationItem.rightBarButtonItem = self.editButtonItem;

 self.title = @"My Zoo";
}
We also need to edit the didSelectRowAtIndexPath
function in this file, edit it to look like below:
- (void)tableView:(UITableView *)tableView didSelectRowAtIndexPath:(NSIndexPath *)indexPath {
   // Navigation logic -- create and push a new view controller
 SQLiteTutorialAppDelegate *appDelegate = (SQLiteTutorialAppDelegate *)[[UIApplication sharedApplication] delegate];
 Animal *animal = (Animal *)[appDelegate.animals objectAtIndex:indexPath.row];

 if(self.animalView == nil) {
  AnimalViewController *viewController = [[AnimalViewController alloc] initWithNibName:@"AnimalViewController" bundle:nil];
  self.animalView = viewController;
  [viewController release];
 }

 // Setup the animation
 [self.navigationController pushViewController:self.animalView animated:YES];
 // Set the title of the view to the animal's name
 self.animalView.title = [animal name];
 // Set the description field to the animals description
 [self.animalView.animalDesciption setText:[animal description]];
 // Load the animals image into a NSData boject and then assign it to the UIImageView
 NSData *imageData = [NSData dataWithContentsOfURL:[NSURL URLWithString:[animal imageURL]]];
 UIImage *animalImage = [[UIImage alloc] initWithData:imageData cache:YES];
 self.animalView.animalImage.image = animalImage;

}
What we are doing here is checking to see if the animalView object has already been created, if not then create it.
The next few lines are used to setup the animation (slide from right to left) and to set the actual data fields to those of the selected animal.
Now you should be ready to fire up the application and see it in all its glory.
You should see your windows looking like below.

5. Project Files
Here are the source files for this project: Download the project source files
If you have any questions or comments please feel free to post them here and I will try to get back to you ASAP. Also keep your eye out for my second part to the advanced RSS Reader tutorial, it will be using TouchXML, SQLite, UIWebview and more!
Đăng ký:
Bài đăng (Atom)