Thứ Hai, 19 tháng 11, 2012

Install Android sdk on Ubuntu

Download and Install AndroidSDK in Ubuntu 12.04 (Precise Pangolin)

(Copied from: http://www.blogger.com/blogger.g?blogID=8949301573698937447#editor/target=post;postID=3476671608255784261)

Android SDK is a development environment for the Android mobile operating system which allows you to write applications for Android devices or gain elevated privileges on android devices with the help of third party software.
This brief tutorial is going to show you how to download and install it in Ubuntu 12.04 if you haven’t already done so. To install it, you first need to install Java JDK package or use the openJDK Java alternative that comes with Ubuntu.
In this tutorial, I’m going to be using the openJDK version of Java. To install Oracle Java version, then read this post first.
Objectives:
  • Install AndroidSDK in Ubuntu 12.04 (Precise Pangolin)
  • Enjoy!

To get started, press Ctrl – Alt – T on your keyboard to open the terminal. When it opens, run the commands below to install OpenJDK.
sudo apt-get install openjdk-6-jre openjdk-6-jdk icedtea6-plugin

android_precise

Next, download AndroidSDK package by running the commands below. At the time of this writing, the current version was r20. Or click this link to download the .tgz archive file.
wget http://dl.google.com/android/android-sdk_r20-linux.tgz

android_precise_1

After downloading, run the commands below to extract the downloaded file.
tar -xvzf android-sdk_r20-linux.tgz

android_precise_2

After extracting the package, run the command below to change into the tools directory.
cd ~/android-sdk-linux/tools

android_precise_3

Finally, run the commands below to begin the installation.
./android

android_precise_4

Install Android updates if there are any available.

android_precise_5

After updating, run the commands below to include AndroidSDK in your path environment.
gedit ~/.bashrc

Then add these lines at the very top of the file and save it.
export PATH=${PATH}:~/android-sdk-linux/toolsexport PATH=${PATH}:~/android-sdk-linux/platform-tools

android_precise_6


Log out and log back in, then type android on the command line to launch the software.
android

Build your own phone.

Thứ Năm, 30 tháng 8, 2012

Export csv with web2py

In controller, forxample default.py:

def export_csv():
  
    animals = db().select(db.purchase_type.ALL)
    fname='hello.csv'
  
    return dict(animals1=animals, fname=fname)


In view: view/default folder:
make flie export_csv.csv:

{{
import cStringIO
stream=cStringIO.StringIO()
animals1.export_to_csv_file(stream)
response.headers['Content-Type']='application/vnd.ms-excel'
response.headers['Content-disposition']='attachment;filename='+fname
response.write(stream.getvalue(), escape=False)
}} 


Save to system file?, simple:
f = open('hello.csv', 'w')
f.write(stream.getvalue())
f.close()

Enjoy!

Thứ Tư, 15 tháng 8, 2012

Posting data to url in Objective-C

Copy from: http://panditpakhurde.wordpress.com/2009/04/16/posting-data-to-url-in-objective-c/
 
Here, I am leaving some important notes that you can use in your code for sending data for login page link or a particular forum link using objective C. Also you can use this for posting comments or posting posts to a particular forum or url link.
I am mentioning all the relative apis with the dummy urls for your understanding the whole procedure. Follow the points as per mentioned below

For sake of understanding , take an example of sending username and password to your login page. To do this follow the following steps.

1. set post string with actual username and password.


NSString *post = [NSString stringWithFormat:@"&Username=%@&Password=%@",@"username",@"password"];


2. Encode the post string using NSASCIIStringEncoding and also the post string you need to send in NSData format.


NSData *postData = [post dataUsingEncoding:NSASCIIStringEncoding allowLossyConversion:YES];


You need to send the actual length of your data. Calculate the length of the post string.


NSString *postLength = [NSString stringWithFormat:@"%d",[postData length]];


3. Create a Urlrequest with all the properties like HTTP method, http header field with length of the post string.
Create URLRequest object and initialize it.


NSMutableURLRequest *request = [[[NSMutableURLRequest alloc] init] autorelease];


Set the Url for which your going to send the data to that request.


[request setURL:[NSURL URLWithString:[NSString stringWithFormat:@"http://www.abcde.com/xyz/login.aspx"]]];


Now, set HTTP method (POST or GET).
Write this lines as it is in your code.


[request setHTTPMethod:@"POST"];


Set HTTP header field with length of the post data.


[request setValue:postLength forHTTPHeaderField:@"Content-Length"];


Also set the Encoded value for HTTP header Field.


[request setValue:@"application/x-www-form-urlencoded" forHTTPHeaderField:@"Current-Type"];


Set the HTTPBody of the urlrequest with postData.


[request setHTTPBody:postData];


4. Now, create URLConnection object. Initialize it with the URLRequest.


NSURLConnection *conn = [[NSURLConnection alloc]initWithRequest:request delegate:self];


It returns the initialized url connection and begins to load the data for the url request. You can check that whether you URL connection is done properly or not using just if/else statement as below.


if(conn)
{
NSLog(@”Connection Successful”)
}
else
{
NSLog(@”Connection could not be made”);
}


5. To receive the data from the HTTP request , you can use the delegate methods provided by the URLConnection Class Reference. Delegate methods are as below.


- (void)connection:(NSURLConnection *)connection didReceiveData:(NSData*)data


Above method is used to receive the data which we get using post method.


- (void)connection:(NSURLConnection *)connection didFailWithError:(NSError *)error


This method , you can use to receive the error report in case of connection is not made to server.


- (void)connectionDidFinishLoading:(NSURLConnection *)connection


The above method is used to process the data after connection has made successfully.


Have a Happy Coding !

Thứ Ba, 14 tháng 8, 2012

Extending PhoneGap with native plugins for iOS

Copy from: http://www.adobe.com/devnet/html5/articles/extending-phonegap-with-native-plugins-for-ios.html

This article examines native plugins for PhoneGap (also known as Apache Cordova) applications in Xcode, targeting iOS devices. If you are just starting out with PhoneGap or if you need to review the fundamentals of PhoneGap, read Getting started with PhoneGap in Xcode for iOS before continuing.
The terms Cordova and PhoneGap are used interchangeably within this article to refer to the same open source application platform that lets you create natively-installed mobile applications using HTML and JavaScript. The PhoneGap codebase moved to open source at Apache Software Foundation under the name Cordova. Adobe is still distributing it under the name PhoneGap. For more information, check out Brian Leroux's blog post "PhoneGap, Cordova, and what's in a name?" As Brian says in the post, "Currently, the only difference is in the name of the download package and will remain so for some time."
Not only does PhoneGap enable you to build user interfaces for natively installed mobile applications using web technologies, PhoneGap also provides a JavaScript-based API to interact with native device functionality. By default, PhoneGap provides access to the device camera, accelerometer, file system, GPS location, and media playback among other capabilities. However, PhoneGap does not expose every native API for use within your JavaScript applications. If you want PhoneGap to do more than its default feature set, you can use the PhoneGap native plugin model to extend the capabilities of the core PhoneGap API.
Native plugins in PhoneGap are not like plugins in desktop browsers; rather they provide a way for you to plug in custom code to add to what the PhoneGap application framework can do. PhoneGap native plugins enable you to create completely new, custom functionality in native code, and expose that to your PhoneGap applications via PhoneGap's native-to-JavaScript bridge. This means that you can expose any native library or framework for use within your JavaScript-based PhoneGap applications.

Understanding the PhoneGap native plugin structure


Before you start to write PhoneGap native plugins, it will help to understand how the PhoneGap application container exposes native operating system functionality to JavaScript-based applications.
All Cordova APIs consist of two related parts: a JavaScript-based interface that can be accessed within your applications, and the corresponding native class for performing operations in native code. Typically, the JavaScript classes and the native classes have APIs that mirrors each other, so that they are easy to follow. The JavaScript class invokes the native code using the Cordova.exec() function. When it invokes Cordova.exec , it can pass in a result handler function, an error handler function, and an array of parameters to be passed into native code, as well as a reference to the native class's name and native function name. Cordova will manage the JavaScript-to-native communication, and you can focus on building your application.
To learn more about PhoneGap native plugins, take a look at the core API's source code, available at the Cordova wiki. The entire PhoneGap framework is built upon the same paradigm you'll find there.

Building your first plugin


To start building your first PhoneGap native plugin, you'll need to create a new PhoneGap project following the steps outlined in the article Getting started with PhoneGap in Xcode for iOS. I named my project MyFirstPhoneGapNativePlugin.

The JavaScript class

Once you have set up your Hello Xcode project, you're ready to create the JavaScript interface for the native plugin. You will need to create a class with functions that will mirror the logic exposed by the native code. Under the www folder, create a JavaScript file named HelloPlugin.js that contains the simple JavaScript class shown below.

var HelloPlugin = { callNativeFunction: function (success, fail, resultType) { return Cordova.exec( success, fail, "com.tricedesigns.HelloPlugin", "nativeFunction", [resultType]); } };

The HelloPlugin class has a single function named callNativeFunction , which accepts a success callback function, an error callback function, and a resultType string parameter. The callNativeFunction function wraps the Cordova.exec function, which will invoke the actual native code. There is no additional JavaScript inside of this class, but you can add JavaScript code here if you need to.
When Cordova.exec is invoked, it expects five parameters:
  • a reference to a success callback function (a function that will be invoked upon a successful response from the native code layer)
  • an error callback function (a function that will be invoked upon an error response from the native layer)
  • a string reference to the native code class (I cover this in more detail below)
  • a string reference to the name of the function that should be invoked
  • an array of parameters to be passed into the native code
Keep in mind that code execution between the JavaScript and native code layers is not synchronous, so you'll need to use callback functions and asynchronous coding practices when developing PhoneGap native plugins.

The Native class

To create the native code layer, start by creating a new native Objective-C class that extends the CDVPlugin class from the core Cordova API:
  1. Right-click the Plugins directory inside of your PhoneGap project, and select New File (see Figure 1).

Figure 1. Creating the new file.

  1. In the New File wizard, select the Objective-C class template and click Next (see Figure 2).

Figure 2. Selecting the Object-C class template.

  1. Type HelloPlugin for the new class name and make the class a subclass of CDVPlugin (see Figure 3).

Figure 3. Naming the class.

The CDVPlugin class is the parent class that all Cordova classes must extend. The CDVPlugin class encapsulates all logic necessary for native-JavaScript communication via the PhoneGAP API. The PhoneGap.exec function enables you to invoke functions on this new class. The CDVPlugin class has a core function named writeJavascript , which enables you to invoke JavaScript within the PhoneGap application's web view. All communication in the direction of native to web JavaScript must be done using the writeJavascript function.
  1. Click Next.
  2. When prompted specify a location for the new files (preferably the "Plugins" directory within your Xcode project), and then click Finish to proceed.
You should see the new header file (.h) and implementation file (.m) in your PhoneGap project (see Figure 4).

Figure 4. The new native class files.

  1. Next, add a definition for the nativeFunction function in your .h file; for example:

#import @interface HelloPlugin : CDVPlugin - (void) nativeFunction:(NSMutableArray*)arguments withDict:(NSMutableDictionary*)options; @end

This definition has two parameters: an NSMutableArray of arguments received from the JavaScript layer and a dictionary (map) of options. For this example, you only need to worry about the array of arguments. The header file only contains method signatures; you do not include any application logic in the .h file.
  1. Once you've created your class signature, add your logic to the nativeFunction function instance in the .m file. Below you will see a sample Objective-C function used inside of this native plugin class.

#import "HelloPlugin.h" @implementation HelloPlugin - (void) nativeFunction:(NSMutableArray*)arguments withDict:(NSMutableDictionary*)options { //get the callback id NSString *callbackId = [arguments pop]; NSLog(@"Hello, this is a native function called from PhoneGap/Cordova!"); NSString *resultType = [arguments objectAtIndex:0]; CDVPluginResult *result; if ( [resultType isEqualToString:@"success"] ) { result = [CDVPluginResult resultWithStatus:CDVCommandStatus_OK messageAsString: @"Success :)"]; [self writeJavascript:[result toSuccessCallbackString:callbackId]]; } else { result = [CDVPluginResult resultWithStatus:CDVCommandStatus_ERROR messageAsString: @"Error :("]; [self writeJavascript:[result toErrorCallbackString:callbackId]]; } } @end

Inside of the nativeFunction method, you first need to get a reference to the NSString callbackId , which is used by the core PhoneGap API to map the response of this function back to the originating JavaScript that invoked this function.
Next this method writes a message out to the Xcode debug console using NSLog ; this just shows that it is executing native code.
After writing to the debug console, the function examines the resultType that was passed into the function, and creates the appropriate CDVPluginResult instance. The resultType value is a simple string. If resultType is " success" , the function will create a success result, and write the success callback to the JavaScript layer using the [self writeJavascript] function. Any other value for the resultType parameter will generate an error result, and the function will write the error callback to the JavaScript layer.
When you write back to the success or error callback functions in JavaScript, always use a CDVPluginResult instance. However, you can also use the writeJavascript function to pass any JavaScript string back to the JavaScript layer. This technique can even be used to push data from the native layer to the JavaScript layer in real time.

Invoking the plugin


Now that you have created a plugin, you can invoke it from within your PhoneGap application.
  1. First, you will need to add a reference to the new plugin's JavaScript interface class (HelloPlugin.js). Add a new

  1. Also after the onDeviceReady() function, add the JavaScript for invoking the native plugin and handling the plugin results. Add JavaScript functions named callNativePlugin , nativePluginResultHandler , and nativePluginErrorHandler as shown below:

function callNativePlugin( returnSuccess ) { HelloPlugin.callNativeFunction( nativePluginResultHandler, nativePluginErrorHandler, returnSuccess ); } function nativePluginResultHandler (result) { alert("SUCCESS: \r\n"+result ); } function nativePluginErrorHandler (error) { alert("ERROR: \r\n"+error ); }

  1. The callNativePlugin function will simply call the JavaScript interface of the native plugin class. When it invokes the callNativeFunction method, it passes the callback functions for success and error status received from the native code layer. The nativePluginResultHandler function will be invoked if there is a success callback from the native layer, and the nativePluginErrorHandler function will be invoked upon an error callback from the native layer.
  1. Next add two JavaScript buttons as shown in the code below to invoke the plugin.


Hey, it's Cordova!


When clicked, the first button will invoke the callNativeFunction method with the parameter "success". PhoneGap will then execute native code and invoke a success callback in the JavaScript layer (it will invoke the nativePluginResultHandler function).
When you click the second button, the callNativeFunction method with will be called with the parameter "error". PhoneGap will execute native code and invoke an error callback in the JavaScript layer (it will invoke the nativePluginErrorHandler function).

Mapping the native code class

At this point you have almost everything wired up and ready to go, but there is still one more step that you have to complete before you will be able to invoke native code from JavaScript.
You have to add a mapping so that Cordova can identify your native code class. Remember the string reference that you used to identify the native class when calling Cordova.exec? You need to map that string to the actual class instance in the Cordova.plist file. The Cordova.plist file contains all configuration information for the current Cordova project.
  1. In the project navigator, open the Supporting Files folder, and click the file named Cordova.plist.
  2. On the right, scroll down to the Plugins entry and click to expand it.
  3. Add an entry with the key com.tricedesigns.HelloPlugin and the value "HelloPlugin" (see Figure 5), and replace com.tricedesigns with your company identifier. This is the string reference that you used to identify the native class in the third parameter when calling Cordova.exec.
The key is the unique string reference that is used by PhoneGap.exec to map to the native code class. The value is the name of the actual native class that will be invoked.
  1. Save your changes.

Figure 5. Editing Cordova.plist.

Now you are ready to launch the application and test it out.
To launch the application click the Run button or choose Product > Run.
Once the application launches in the iOS Simulator (or on a connected device), you will see a simple interface with two buttons (see Figure 6). Click on either button to invoke the native plugin's native code, and an alert message will be displayed via JavaScript upon either a success or error callback.

Figure 6. The application running in the iOS simulator.

When the native code is invoked, you will also be able to see output in the Xcode debug console window, which reflects the output from the native plugin's NSLog call (see Figure 7).

Figure 7. Logged information in the Xcode debug console.

Where to go from here


You now know how to start creating native plugins for PhoneGap applications on iOS devices. You can use this technique to access iOS frameworks that are not exposed by the core PhoneGap SDK, including (but not limited to) the Game Center, Core Audio, and Bonjour frameworks, or any other native code. Also, don't forget to check out the many existing PhoneGap native plugins on GitHub that have been developed by the open source community.

Thứ Sáu, 3 tháng 8, 2012

Apple Push Notification Services Tutorial: Part 1/2

This is a post by iOS Tutorial Team member Matthijs Hollemans, an experienced iOS developer and designer.
In iOS, apps can’t do a lot in the background. Apps are only allowed to do limited set of activities so battery life is conserved.
But what if something interesting happens and you wish to let the user know about this, even if they’re not currently using your app?
For example, maybe the user received a new tweet, their favorite team won the game, or their dinner is ready. Since the app isn’t currently running, it cannot check for these events.
Luckily, Apple has provided a solution to this. Instead of your app continuously checking for events or doing work in the background, you can write a server-side component to do this instead.
And when an event of interest occurs, the server-side component can send the app a push notification! There are three things a push notification can do:
  • Display a short text message
  • Play a brief sound
  • Set a number in a badge on the app’s icon
You can combine these however you see fit; for example, play a sound and set the badge but not display a message.
In this 2-part tutorial series, you’ll get to try this out for yourself by making a simple app that uses APNS!
In this first part, you’ll learn how to configure your app to receive push notifications and receive a test message.
This tutorial is for intermediate or advanced iOS developers. If you are still a beginner to iOS, you should check out some of the other tutorials on this site first. Also, it’s highly recommended that you review these two tutorials first (or have equivalent knowledge):
Without further ado, let’s push through this!

Brief Overview

Getting push to work for your app takes quite a bit of effort. This is a puzzle with many pieces. Here is an overview:
Apple Push Notification Services (APNS) Overview
  1. An app enables push notifications. The user has to confirm that he wishes to receive these notifications.
  2. The app receives a “device token”. You can think of the device token as the address that push notifications will be sent to.
  3. The app sends the device token to your server.
  4. When something of interest to your app happens, the server sends a push notification to the Apple Push Notification Service, or APNS for short.
  5. APNS sends the push notification to the user’s device.
When the user’s device receives the push notification, it shows an alert, plays a sound and/or updates the app’s icon. The user can launch the app from the alert. The app is given the contents of the push notification and can handle it as it sees fit.
Are push notifications still worth it now that we have OS 4 with its local notifications and multitasking? You bet!
Local notifications are limited to scheduling timed events and unlimited background processing is only available to apps that do VOIP, navigation or background audio. If you want to notify the users of your app about external events while the app is closed, you still need push notifications.
In this tutorial, I will explain in detail how the push notification system works and how to build push into your own app. There is a lot to explain, so take your time to let it all sink in.

What You Need for Push Notifications

To add push notifications to your app, you need:
An iPhone or iPad. Push notifications do not work in the simulator, so you will need to test on the device.
An iOS Developer Program membership. You need to make a new App ID and provisioning profile for each app that uses push, as well as an SSL certificate for the server. You do this at the iOS Provisioning Portal.
If you want to follow along with the examples in this tutorial, you will need to create your own provisioning profile and SSL certificate; you cannot use mine. Because it’s important to get the certificate right, I’ll explain in detailed steps how to obtain one.
A server that is connected to the internet. Push notifications are always sent by a server. For development you can use your Mac as the server (which we’ll do in this tutorial) but for production use, you need at least something like a VPS (Virtual Private Server).
A cheap shared hosting account is not good enough. You need to be able to run a background process on the server, install an SSL certificate, and be able to make outgoing TLS connections on certain ports.
Most shared hosting providers do not let you do this, although they might if you ask. However, I really recommend using a VPS host such as Linode.

Anatomy of a Push Notification

Your server is responsible for creating the push notification messages, so it’s useful to know what they look like.
A push notification is a short message that consists of the device token, a payload, and a few other bits and bytes. The payload is what we are interested in, as that contains the actual data we will be sending around.
Your server should provide the payload as a JSON dictionary. The payload for a simple push message looks like this:
{
 "aps":
 {
  "alert": "Hello, world!",
  "sound": "default"
 }
}
For the JSON uninitiated, a block delimited by curly { } brackets contains a dictionary that consists of key/value pairs (just like an NSDictionary).
The payload is a dictionary that contains at least one item, “aps”, which itself is also a dictionary. In our example, “aps” contains the fields “alert” and “sound”. When this push notification is received, it shows an alert view with the text “Hello, world!” and plays the standard sound effect.
There are other items you can add to the “aps” section to configure the notification. For example:
{
 "aps":
 {
  "alert":
  {
   "action-loc-key": "Open",
   "body": "Hello, world!"
  },
  "badge": 2
 }
}
Now “alert” is a dictionary of its own. The “action-loc-key” provides an alternative text for the “View” button. The “badge” field contains the number that will be shown on the application icon. This notification will not play a sound.
There are many more ways to configure the JSON payload. You can change the sound that is played, you can provide localized text, and you can add fields of your own. For more information, check out the official Local and Push Notification Programming Guide.
Push notifications are intended to be small; the payload size can be no more than 256 bytes. That leaves you about as much room as fits in an SMS message or a tweet. A smart push server won’t waste space on newlines and whitespace and generates something that looks like:
{"aps":{"alert":"Hello, world!","sound":"default"}}
It’s less easy to read for us humans, but it saves enough bytes to make it worth it. Push notifications whose payload exceeds 256 bytes will not be accepted by APNS.

Push Notification Gotchas

Push Notifications Are Unreliable!
They are not reliable! There is no guarantee that push notifications will actually be delivered, even if the APNS server accepted them.
As far as your server is concerned, push notifications are fire-and-forget; there is no way to find out what the status of a notification is after you’ve sent it to APNS. The delivery time may also vary, from seconds up to half an hour.
Also, the user’s iPhone may not be able to receive push notifications all the time. They could be on a WiFi network that does not allow connections to be made to APNS because the required ports are blocked. Or the phone could be turned off.
APNS will try to deliver the last notification it received for that device when it comes back online, but it will only try for a limited time. Once it times out, the push notification will be lost forever!
After looking at the APNS Server Bill
They can be expensive! Adding push functionality to your app is fairly easy and inexpensive if you own the data, but can be expensive if you have a lot of users or data you need to poll.
For example, it’s no problem if you want to notify your users when the contents of your own RSS feed change. Because you control that RSS feed and know when it changes — when you update the content on your web site — your server can send out the notifications at the right moment.
But what if your app is an RSS feed reader that allows users to put in their own URLs? In that case you need to come up with some mechanism to detect updates to those feeds.
In practice this means your server will need to continuously poll those feeds for changes. If you have a lot of users, you may have to install a bunch of new servers to handle all that processing and bandwidth. For apps such as these, push can become quite expensive and may not be worth it for you.
OK, enough theory. It’s time to learn how to do this push thing. Before we can get to the good stuff – programming! – there is some boring set-up work to be done on the iOS Provisioning Portal, so let’s get that over with as quickly as possible.

Provisioning Profiles and Certificates, Oh My!

APNS needs a certificate!
To enable push notifications in your app, it needs to be signed with a provisioning profile that is configured for push. In addition, your server needs to sign its communications to APNS with an SSL certificate.
The provisioning profile and SSL certificate are closely tied together and are only valid for a single App ID. This is a protection that ensures only your server can send push notifications to instances of your app, and no one else.
As you know, apps use different provisioning profiles for development and distribution. There are also two types of push server certificates:
  • Development. If your app is running in Debug mode and is signed with the Development provisioning profile (Code Signing Identity is “iPhone Developer”), then your server must be using the Development certificate.
  • Production. Apps that are distributed as Ad Hoc or on the App Store (when Code Signing Identify is “iPhone Distribution”) must talk to a server that uses the Production certificate. If there is a mismatch between these, push notifications cannot be delivered to your app.
In this tutorial, we won’t bother with the distribution profiles and certificates and just use the ones for development.

Generating the Certificate Signing Request (CSR)

Remember how you had to go to the iOS Provisioning Portal and make a Development Certificate after you signed up for the iOS Developer Program? If so, then these next steps should be familiar. Still, I advise you to follow them exactly. Most of the problems people have with getting push notifications to work are due to problems with the certificates.
Digital certificates are based on public-private key cryptography. You don’t need to know anything about cryptography to use certificates, but you do need to be aware that a certificate always works in combination with a private key.
The certificate is the public part of this key pair. It is safe to give it to others, which is exactly what happens when you communicate over SSL. The private key, however, should be kept… private. It’s a secret. Your private key is nobody’s business but your own. It’s important to know that you can’t use the certificate if you don’t have the private key.
Whenever you apply for a digital certificate, you need to provide a Certificate Signing Request, or CSR for short. When you create the CSR, a new private key is made that is put into your keychain. You then send the CSR to a certificate authority (in this case that is the iOS Developer Portal), which will generate the SSL certificate for you based on the information in the CSR.
Open Keychain Access on your Mac (it is in Applications/Utilities) and choose the menu option Request a Certificate from a Certificate Authority….
Requesting a certificate with Keychain Access
If you do not have this menu option or it says “Request a Certificate from a Certificate Authority with key”, then download and install the WWDR Intermediate Certificate first. Also make sure no private key is selected in the main Keychain Access window.
You should now see the following window:
Generating a certificate sign request with Keychain Access
Enter your email address here. I’ve heard people recommended you use the same email address that you used to sign up for the iOS Developer Program, but it seems to accept any email address just fine.
Enter “PushChat” for Common Name. You can type anything you want here, but choose something descriptive. This allows us to easily find the private key later.
Check Saved to disk and click Continue. Save the file as “PushChat.certSigningRequest”.
If you go to the Keys section of Keychain Access, you will see that a new private key has appeared in your keychain. Right click it and choose Export.
Exporting your private key with keychain access
Save the private key as “PushChatKey.p12” and enter a passphrase.
For the convenience of this tutorial, I used the passphrase “pushchat” to protect the p12 file but you should really choose something that is less easy to guess. The private key needs to be a secret, remember? Do choose a passphrase that you can recall, or you won’t be able to use the private key later.

Making the App ID and SSL certificate

Log in to the iOS Provisioning Portal.
First, we are going to make a new App ID. Each push app needs its own unique ID because push notifications are sent to a specific application. (You cannot use a wildcard ID.)
Go to App IDs in the sidebar and click the New App ID button.
Creating a new App ID
I filled in the fields as follows:
  • Description: PushChat
  • Bundle Seed ID: Generate New (this is the default option)
  • Bundle Identifier: com.hollance.PushChat
It is probably best if you choose your own Bundle Identifier here – com.yoursite.PushChat – instead of using mine. You will need to set this same bundle ID in your Xcode project.
In a few moments, we will generate the SSL certificate that your push server uses to make a secure connection to APNS. This certificate is linked with your App ID. Your server can only send push notifications to that particular app, not to any other apps.
After you have made the App ID, it shows up like this in the list:
List of App IDs in the iOS Provisioning Portal
In the “Apple Push Notification service” column, there are two orange lights that say “Configurable for Development” and “Configurable for Production”. This means our App ID can be used with push, but we still need to set this up. Click on the Configure link to open the Configure App ID screen.
Configuring your App ID in the iOS Provisioning Portal
Check the Enable for Apple Push Notification service box and click on the Configure button for the Development Push SSL Certificate. The “Apple Push Notification service SSL Certificate Assistant” pops up:
Uploading your CSR with the SSL Assistant
The first thing it asks you is to generate a Certificate Signing Request. We already did that, so click Continue. In the next step you upload the CSR. Choose the CSR file that you generated earlier and click Generate.
Generating a Certificate with the SSL Assistant
It takes a few seconds to generate the SSL certificate. Click Continue when it’s done.
Downloading a certificate with the SSL assistant
Now click Download to get the certificate – it is named “aps_developer_identity.cer”. Click Done to close the assistant and return to the Configure App ID screen.
Screenshot after the SSL Assistant is Complete
As you can see, we have a valid certificate and push is now available for development. You can download the certificate again here if necessary. The development certificate is only valid for 3 months.
When you are ready to release your app, repeat this process for the production certificate. The steps are the same.
Note: The production certificate remains valid for a year, but you want to renew it before the year is over to ensure there is no downtime for your app.
You don’t have to add the certificate to your Keychain, although you could if you wanted to by double-clicking the downloaded aps_developer_identity.cer file. If you do, you’ll see that it is now associated with the private key.

Making a PEM file

So now we have three files:
  • The CSR
  • The private key as a p12 file (PushChatKey.p12)
  • The SSL certificate, aps_developer_identity.cer
Store these three files in a safe place. You could throw away the CSR but in my opinion it is easier to keep it. When your certificate expires, you can use the same CSR to generate a new one. If you were to generate a new CSR, you would also get a new private key. By re-using the CSR you can keep using your existing private key and only the .cer file will change.
We have to convert the certificate and private key into a format that is more usable for us. Because the push part of our server will be written in PHP, we will combine the certificate and the private key into a single file that uses the PEM format.
The specifics of what PEM is doesn’t really matter (in fact, I have no idea) but it makes it easier for PHP to use our certificate. If you write your push server in another language, these following steps may not apply to you.
We’re going to use the command-line OpenSSL tools for this. Open a Terminal and execute the following steps.
Go to the folder where you downloaded the files, in my case the Desktop:
$ cd /Users/matthijs/Desktop
Convert the .cer file into a .pem file:
$ openssl x509 -in aps_developer_identity.cer -inform der 
    -out PushChatCert.pem
Convert the private key’s .p12 file into a .pem file:
$ openssl pkcs12 -nocerts -out PushChatKey.pem -in PushChatKey.p12
Enter Import Password: 
MAC verified OK
Enter PEM pass phrase: 
Verifying - Enter PEM pass phrase: 
You first need to enter the passphrase for the .p12 file so that openssl can read it. Then you need to enter a new passphrase that will be used to encrypt the PEM file. Again for this tutorial I used “pushchat” as the PEM passphrase. You should choose something more secure.
Note: if you don’t enter a PEM passphrase, openssl will not give an error message but the generated .pem file will not have the private key in it.
Finally, combine the certificate and key into a single .pem file:
$ cat PushChatCert.pem PushChatKey.pem > ck.pem
At this point it’s a good idea to test whether the certificate works. Execute the following command:
$ telnet gateway.sandbox.push.apple.com 2195
Trying 17.172.232.226...
Connected to gateway.sandbox.push-apple.com.akadns.net.
Escape character is '^]'.
This tries to make a regular, unencrypted, connection to the APNS server. If you see the above response, then your Mac can reach APNS. Press Ctrl+C to close the connection. If you get an error message, then make sure your firewall allows outgoing connections on port 2195.
Let’s try connecting again, this time using our SSL certificate and private key to set up a secure connection:
$ openssl s_client -connect gateway.sandbox.push.apple.com:2195 
    -cert PushChatCert.pem -key PushChatKey.pem
Enter pass phrase for PushChatKey.pem: 
You should see a whole bunch of output, which is openssl letting you know what is going on under the hood.
If the connection is successful, you should be able to type a few characters. When you press enter, the server should disconnect. If there was a problem establishing the connection, openssl will give you an error message but you may have to scroll up through the output to find it.
Note that there are actually two different APNS servers: the “sandbox” server that you can use for testing, and the live server that you use in production mode. Above, we used the sandbox server because our certificate is intended for development, not production use.

Making the Provisioning Profile

We’re not done yet in the Provisioning Portal. Go to Provisioning in the sidebar and click New Profile.
Creating a Provisioning Profile in the iOS Provisioning Portal
This is how I filled in the fields:
  • Profile Name: PushChat Development
  • Certificates: check your certificate
  • App ID: PushChat
  • Devices: check your devices
This isn’t different from generating any other provisioning profile, which you’ve probably done before. We’re making a new profile because each push app needs to have its own profile that is connected to the proper App ID.
Click Submit and the profile will be generated. The new profile will be in the Pending state. Refresh the Development Provisioning Profiles page; the status should have changed to Active and you can download the file (named PushChat_Development.mobileprovision).
Add the provisioning profile to Xcode by double-clicking it or dragging it onto the Xcode icon.
If you’re reading to release your app to the public, you will have to repeat this process to make an Ad Hoc or App Store distribution profile.

A Very Basic App

So far things haven’t been really exciting, but those preliminaries are necessary. I wanted to show you in detail how to generate the certificate because it’s not something you do every day and push won’t work without it.
We’ve already established that our certificate is valid by connecting to the sandbox server. Let’s test if we can actually send some push notifications!
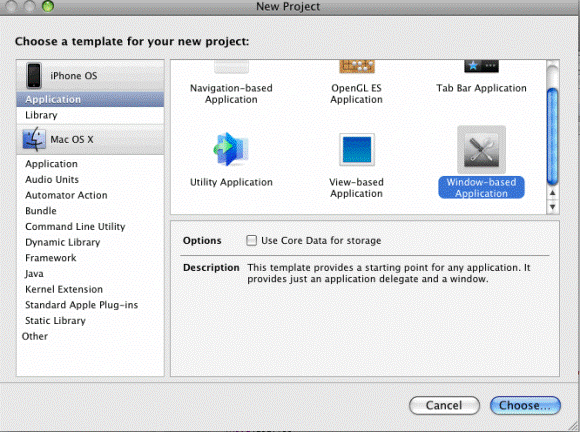
Fire up Xcode and choose File, New Project. In the assistant, pick View-based Application and continue to the next step.
Creating a View-Based Application with Xcode 4
I filled in these fields as follows:
  • Product Name: PushChat
  • Company Identifier: com.hollance
  • Device Family: iPhone
The Product Name and Company Identifier together form the Bundle ID. In my case that is “com.hollance.PushChat”. You should choose a Product Name and Company Identifier that correspond to the App ID that you made earlier in the Provisioning Portal (com.yourname.PushChat).
Finish the assistant and open PushChatAppDelegate.m. Change the didFinishLaunchingWithOptions method to look like this:
- (BOOL)application:(UIApplication *)application didFinishLaunchingWithOptions:(NSDictionary *)launchOptions
{
 self.window.rootViewController = self.viewController;
 [self.window makeKeyAndVisible];
 
 // Let the device know we want to receive push notifications
 [[UIApplication sharedApplication] registerForRemoteNotificationTypes:
  (UIRemoteNotificationTypeBadge | UIRemoteNotificationTypeSound | UIRemoteNotificationTypeAlert)];
 
    return YES;
}
The new call to registerForRemoteNotificationTypes tells the OS that this app wants to receive push notifications.
Build & Run the app. You need to do this on your device because the simulator does not support push notifications. Xcode should automatically have selected the new provisioning profile. If you get a code sign error, then make sure the proper profile is selected in the Code Signing build settings.
When the app starts and registers for push notifications, it shows a message to inform the user that this app wishes to send push notifications.
A Simple iPhone App Requesting Permission to Deliver Notifications
The app asks this only once. If the user picks “OK”, then we should be all set. However, if they choose “Don’t Allow” then our app will never receive push notifications. The user can reverse their decision in the phone’s Settings.
Viewing Push Notification Permissions in iPhone Settings
The name of your app will be added to the phone’s Settings, under Notifications. The user can enable or disable the notifications for your app here, including individual settings for badges, sounds, and alerts.
A single app's Push Notification Settings
Your app can find out which types of push notifications are enabled through:
UIRemoteNotificationType enabledTypes = [[UIApplication sharedApplication] enabledRemoteNotificationTypes];
There is one more thing we need to add to the app in order to be able to receive push notifications. Add the following to PushChatAppDelegate.m:
- (void)application:(UIApplication*)application didRegisterForRemoteNotificationsWithDeviceToken:(NSData*)deviceToken
{
 NSLog(@"My token is: %@", deviceToken);
}
 
- (void)application:(UIApplication*)application didFailToRegisterForRemoteNotificationsWithError:(NSError*)error
{
 NSLog(@"Failed to get token, error: %@", error);
}
When your app registers for remote (push) notifications, it tries to obtain a “device token”. This is a 32-byte number that uniquely identifies your device. Think of the device token as the address that a push notification will be delivered to.
Run the app again and you should see something like this in Xcode’s console window:
My token is: 
<740f4707 462c7eaf="462c7eaf" 5f6aa01d="5f6aa01d" 61bb78ad="61bb78ad" 8e335894="8e335894" 9b7c25d4="9b7c25d4" a5ddb387="a5ddb387" bebcf74f="bebcf74f">
The token is an opaque binary data structure, stuffed into an NSData object. Apple doesn’t want you to mess around with its internals. For our purposes it is enough to know that it is currently 32 bytes long. As you can see above, the token can be represented by 64 hexadecimal characters. We will be using it in that format, although we still strip off the brackets and leave out the spaces.
If you run the app in the simulator, the didFailToRegisterForRemoteNotificationsWithError: method will be called as push notifications are not supported in the simulator.
That’s it for the app. There is one more thing to do and then we can finally see some push notifications in action!

Sending our first push notification

As I’ve mentioned a few times before, you need to set up a server that sends the push notifications to your app. For this first test, we’re not going to set up a server just yet. Instead, I’ll give you a very simple PHP script that sets up a connection to APNS and sends a push notification to a device token that you specify. You can run this straight from your Mac.
Download the SimplePush code and unzip it. You need to make some changes to simplepush.php.
// Put your device token here (without spaces):
$deviceToken = '0f744707bebcf74f9b7c25d48e3358945f6aa01da5ddb387462c7eaf61bbad78';
 
// Put your private key's passphrase here:
$passphrase = 'pushchat';
 
// Put your alert message here:
$message = 'My first push notification!';
You should copy the device token from the app into the $deviceToken variable. Be sure to leave out the spaces and brackets; it should just be 64 hexadecimal characters. Put your private key’s passphrase into $passphrase, and the text you wish to send in $message.
Copy your ck.pem file into the SimplePush folder. Remember, the ck.pem file contains both your certificate and the private key.
Then open a Terminal and type:
$ php simplepush.php
If all goes well, the script should say:
Connected to APNS
Message successfully delivered
And within a few seconds you should receive your first push notification:
Simple app receiving a Push Notification
Note that you won’t see anything when the app is open. The push message is delivered but we did not build anything in the app to handle it yet. Close the app and try again.
If the simplepush.php script exits with an error message, then check that you have made the PEM file correctly, and that you can connect to the sandbox server without problems (see above).
For now, it is not important what the script exactly does. I will talk more about this in the second part of the series when we build a true push server.

Where To Go From Here?

At this point, you’ve successfully set up an app to receive push notifications, and delievered your first push notification through custom PHP code!
Next check out Part 2 of the tutorial series, where I’ll cover how to make a simple direct messaging app called PushChat that uses push notifications to deliver the messages.
There you’ll learn how to make a complete server side API that delivers push notifications continuously in the background!
In the meantime, if you have any questions, comments, or suggestions, feel free to join in the forum discussion below!

Thứ Năm, 26 tháng 7, 2012

How To Use the Three20 Photo Viewer

1. Install Three20 viewer:
git clone git://github.com/facebook/three20.git

2. Configure thre20 for your project
python three20/src/scripts/ttmodule.py -p PhotoViewer/PhotoViewer.xcodeproj Three20

refer more at: http://three20.info/article/2010-10-06-Adding-Three20-To-Your-Project

3. Write sample:
http://www.raywenderlich.com/1430/how-to-use-the-three20-photo-viewer

Note: if you can not configure the sample code in this link. Please create new project, configure follow step 1, 2 then copy code. I did like that, work like a charm.

How to load image from camera roll:
Can not load directly, must use UIImagePickerController to pick then save it to document
Then use url: documents://paht to file to load into Photo object


Thứ Ba, 24 tháng 7, 2012

Download of a file-like python object in web2py

Copy from:http://thadeusb.com/weblog/2010/1/17/download_of_a_filelike_python_object_in_web2py

Here are a couple of ways to expose any python file-like object as download-able in a web2py controller.
You might want to do this if you have a generated pdf report, or allowing an export of the sites content.
From your controller, you can stream a large file by using the stream function of the response object.
Select
return response.stream(filelikeobject, chunk_size=64*1024)
You might also want to set the content type of what you are returning, as well as a new disposition (filename).
Select
def export():
    from gluon.contenttype import contenttype
    response.headers['Content-Type'] = contenttype('.csv')
    response.headers['Content-disposition'] = 'attachment; filename=%s_database.csv' % (
        request.now
    )
    import csv, cStringIO
    s = cStringIO.StringIO()
    db.export_to_csv_file(s, delimiter=',', quotechar='"', quoting=csv.QUOTE_NONNUMERIC)
    return s.getvalue()

Thứ Ba, 19 tháng 6, 2012

How to swipe to delete on tableview cell

Just need 3 delegate methods:
- (UITableViewCellEditingStyle)tableView:(UITableView *)tableView
           editingStyleForRowAtIndexPath:(NSIndexPath *)indexPath {
  
    NSUInteger row = [indexPath row];
    NSUInteger count = [savedTask count];
  
    if (row < count) {
        return  UITableViewCellEditingStyleDelete;
    } else {
        return UITableViewCellEditingStyleNone;
    }
}

/*
 *Commit delete action
 */
- (void)tableView:(UITableView *)tableView
commitEditingStyle:(UITableViewCellEditingStyle)editingStyle
forRowAtIndexPath:(NSIndexPath *)indexPath {
  
    NSUInteger row = [indexPath row];
    NSUInteger count = [savedTask count];
  
    if (row < count) {
        NSMutableArray* temparr = [[NSMutableArray alloc] initWithArray:savedTask];
        [temparr removeObjectAtIndex:row];
        savedTask = temparr;
    }
}

- (void)tableView:(UITableView *)tableView
didEndEditingRowAtIndexPath:(NSIndexPath *)indexPath {
  
    [tableView reloadData];
}

Thứ Bảy, 2 tháng 6, 2012

Horizontal scroll div on touch devices (iPhone, iPad, android)

(Origin: StackOverflow )
"

Thứ Bảy, 21 tháng 4, 2012

UIPickerView

From: http://www.roseindia.net/tutorial/iphone/examples/UIPickerView/UIPickerViewExample.html


Step 1: Create a new project
Fire up Xcode IDE and the select File--> New Project and then select "Window-based Application" from the new project template wizard.


Step 2:
Name the project as "UIPickerView" and then click the "Save" button. The Xcode IDE will create a new project for you.

Step 3: Add ViewController class
Then add new UIViewControllerSubclass as shown below.


and named it as "ViewController.m". The Xcode IDE will automatically create ViewController.h and ViewController.xib files.

Step 4: Add UI Components to the View
Double click on the "ViewController.xib" from the Groups & Files tree and shown below.


Xcode will open the Interface builder. Then add One two label and UIPickerView components on the view as shown below.


Finally save the files and close the Interface builder.

Step 5: Add the code in ViewController.h and ViewController.m files

Open ViewController.h class and then implement the UIPickerViewDelegate, UIPickerViewDataSource classes.

The code for the class will look like:

@interface ViewController : UIViewController


In ViewController.h create following Outlets and variables.
  
    IBOutlet UILabel *mlabel;
    NSMutableArray *arrayNo;
    IBOutlet UIPickerView *pickerView;

and then create the property
@property (nonatomic, retain) UILabel *mlabel;

Your ViewController.m should look like:
//
// ViewController.h
// UIPickerView
//
// Created by Deepak Kumar on 31/07/09.
//

#import

@interface ViewController : UIViewController
{
IBOutlet UILabel *mlabel;
NSMutableArray *arrayNo;
IBOutlet UIPickerView *pickerView;

}
@property (nonatomic, retain) UILabel *mlabel;
@end


In ViewController.m synthesize the label:

@synthesize mlabel;


Add the following code in the viewDidLoad method. Your viewDidLoad should look like:

- (void)viewDidLoad
{
    [super viewDidLoad];
    arrayNo = [[NSMutableArray alloc] init];
    [arrayNo addObject:@" 100 "];
    [arrayNo addObject:@" 200 "];
    [arrayNo addObject:@" 400 "];
    [arrayNo addObject:@" 600 "];
    [arrayNo addObject:@" 1000 "];
   
    [pickerView selectRow:1 inComponent:0 animated:NO];
    mlabel.text= [arrayNo objectAtIndex:[pickerView selectedRowInComponent:0]];   
}


also add the following code into the ViewController.m file.

- (NSInteger)numberOfComponentsInPickerView:(UIPickerView *)pickerView;
{
    return 1;
}

- (void)pickerView:(UIPickerView *)pickerView didSelectRow:(NSInteger)row inComponent:(NSInteger)component
{
    mlabel.text=    [arrayNo objectAtIndex:row];
}

- (NSInteger)pickerView:(UIPickerView *)pickerView numberOfRowsInComponent:(NSInteger)component;
{
    return [arrayNo count];
}

- (NSString *)pickerView:(UIPickerView *)pickerView titleForRow:(NSInteger)row forComponent:(NSInteger)component;
{
    return [arrayNo objectAtIndex:row];
}

The final ViewController.m file should look like:
//
// ViewController.m
// UIPickerView
//
// Created by Deepak Kumar on 31/07/09.
//

#import "ViewController.h"

@implementation ViewController
@synthesize mlabel;

- (void)viewDidLoad
{
[super viewDidLoad];
arrayNo = [[NSMutableArray alloc] init];
[arrayNo addObject:@" 100 "];
[arrayNo addObject:@" 200 "];
[arrayNo addObject:@" 400 "];
[arrayNo addObject:@" 600 "];
[arrayNo addObject:@" 1000 "];
[pickerView selectRow:1 inComponent:0 animated:NO];
mlabel.text= [arrayNo objectAtIndex:[pickerView selectedRowInComponent:0]];
}

- (NSInteger)numberOfComponentsInPickerView:(UIPickerView *)pickerView;
{
return 1;
}

- (void)pickerView:(UIPickerView *)pickerView didSelectRow:(NSInteger)row inComponent:(NSInteger)component
{
mlabel.text= [arrayNo objectAtIndex:row];
}

- (NSInteger)pickerView:(UIPickerView *)pickerView numberOfRowsInComponent:(NSInteger)component;
{
return [arrayNo count];
}

- (NSString *)pickerView:(UIPickerView *)pickerView titleForRow:(NSInteger)row forComponent:(NSInteger)component;
{
return [arrayNo objectAtIndex:row];
}


/*
// The designated initializer. Override if you create the controller programmatically and want to perform customization that is not appropriate for viewDidLoad.
- (id)initWithNibName:(NSString *)nibNameOrNil bundle:(NSBundle *)nibBundleOrNil {
if (self = [super initWithNibName:nibNameOrNil bundle:nibBundleOrNil]) {
// Custom initialization
}
return self;
}
*/

/*
// Implement viewDidLoad to do additional setup after loading the view, typically from a nib.
- (void)viewDidLoad {
[super viewDidLoad];
}
*/

/*
// Override to allow orientations other than the default portrait orientation.
- (BOOL)shouldAutorotateToInterfaceOrientation:(UIInterfaceOrientation)interfaceOrientation {
// Return YES for supported orientations
return (interfaceOrientation == UIInterfaceOrientationPortrait);
}
*/

- (void)didReceiveMemoryWarning {
// Releases the view if it doesn't have a superview.
[super didReceiveMemoryWarning];
// Release any cached data, images, etc that aren't in use.
}

- (void)viewDidUnload
{
// Release any retained subviews of the main view.
// e.g. self.myOutlet = nil;
}


- (void)dealloc {
[super dealloc];
}


@end

Step 6: Create the connections
Double click on the "ViewController.xib" from the Groups & Files tree. And then choose the UIViewPickerView component on the view and create the following Outlets:
dataSoucrce --> File's Owner
delegate --> File's Owner


Then connect the second label to mlabel variable.


Step 7: Load view from UIPickerViewAppDelegate.m class
Open UIPickerViewAppDelegate.h class and then add the code

ViewController *mviewController;

and

@property (nonatomic, retain) ViewController *mviewController;

your file should look like:

#import

@class ViewController;

@interface UIPickerViewAppDelegate : NSObject
{
ViewController *mviewController;
UIWindow *window;
}

@property (nonatomic, retain) IBOutlet UIWindow *window;
@property (nonatomic, retain) ViewController *mviewController;

@end

Open UIPickerViewAppDelegate.m and then add the following code in - (void)applicationDidFinishLaunching:(UIApplication *)application function:

    mviewController = [[ViewController alloc] initWithNibName:@"ViewController" bundle:[NSBundle mainBundle]];
    [window addSubview:mviewController.view];

The UIPickerViewAppDelegate.m should look like:
//
// UIPickerViewAppDelegate.m
// UIPickerView
//
// Created by Deepak Kumar on 31/07/09.
//

#import "UIPickerViewAppDelegate.h"
#import "ViewController.h"


@implementation UIPickerViewAppDelegate

@synthesize window;
@synthesize mviewController;

- (void)applicationDidFinishLaunching:(UIApplication *)application
{
mviewController = [[ViewController alloc] initWithNibName:@"ViewController" bundle:[NSBundle mainBundle]];
[window addSubview:mviewController.view];
[window makeKeyAndVisible];
}

- (void)dealloc
{
[window release];
[ViewController release];
[super dealloc];
}


@end

Step 8: Build and Run
Now click on the Build and Go. You be get the following output in the iPhone simulator.